

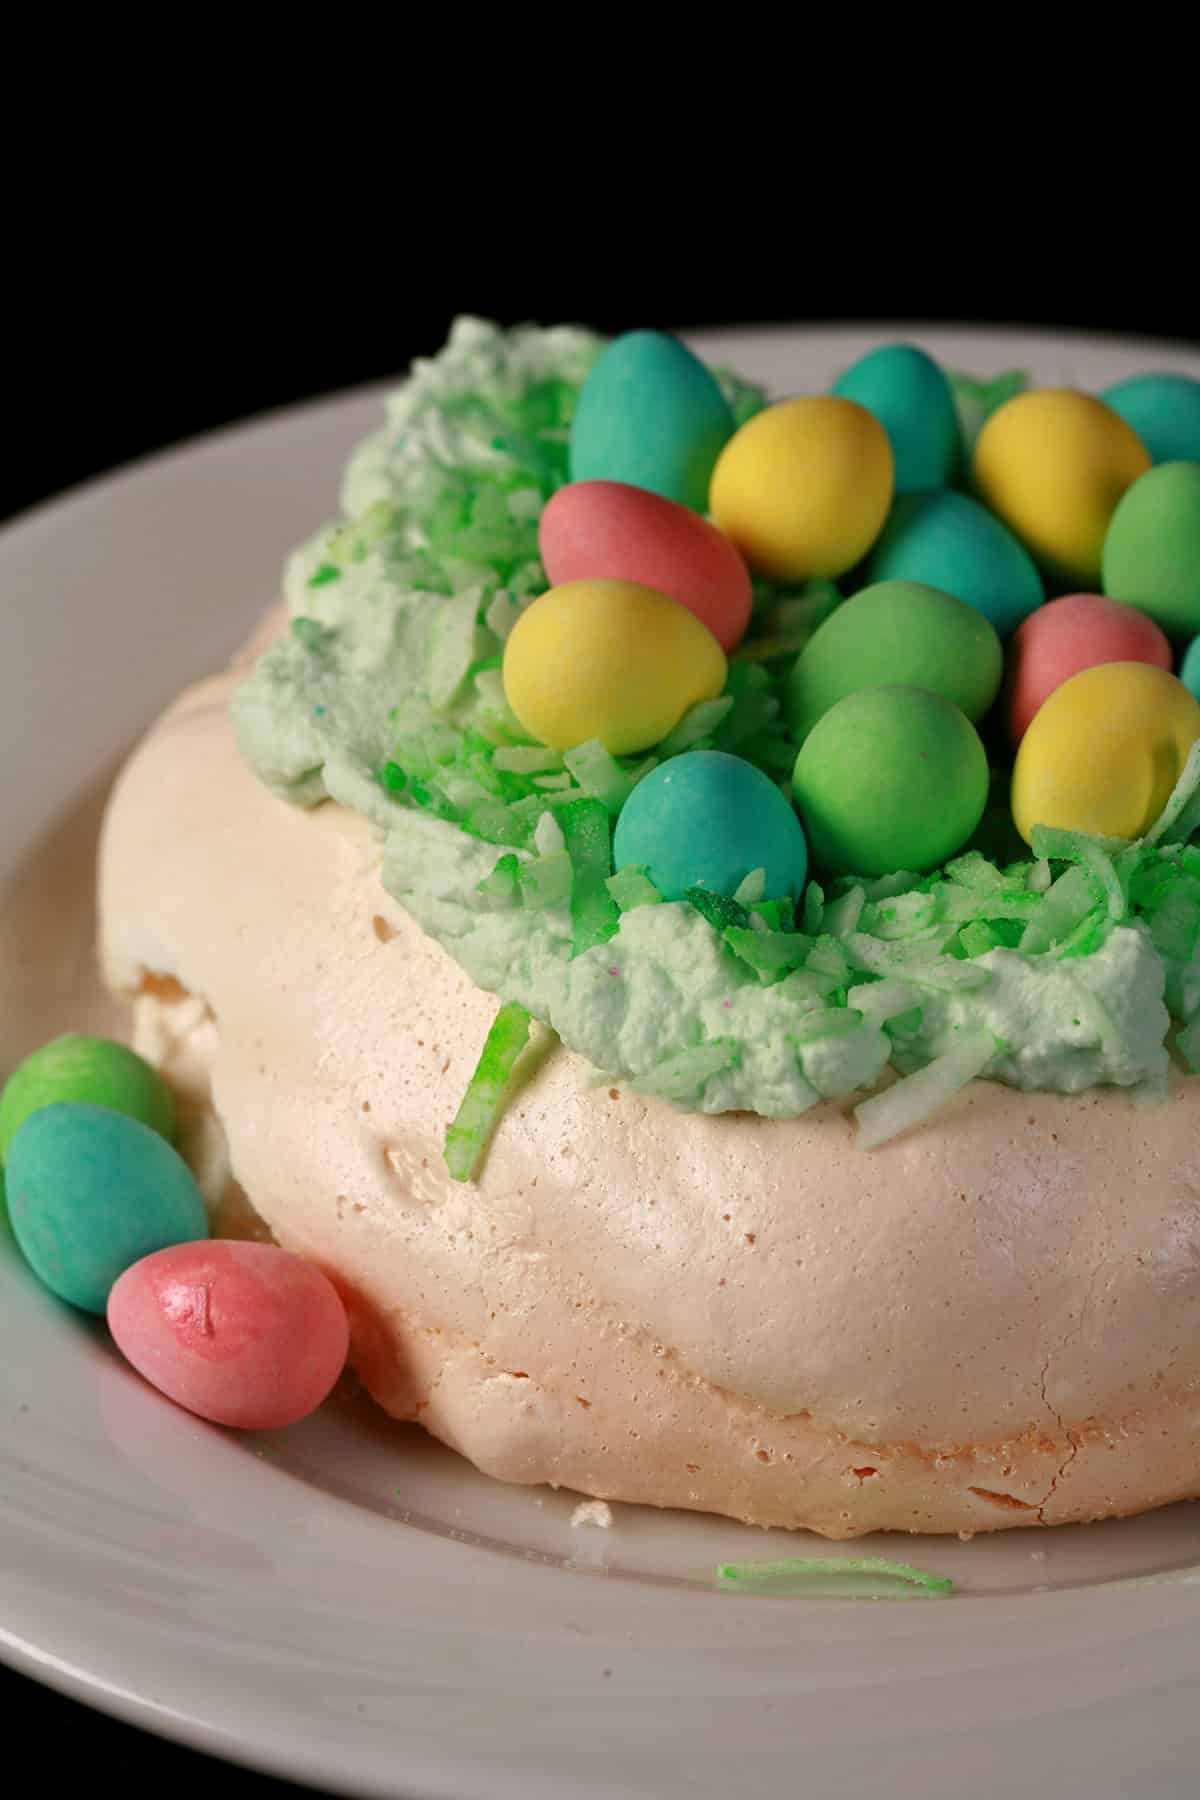
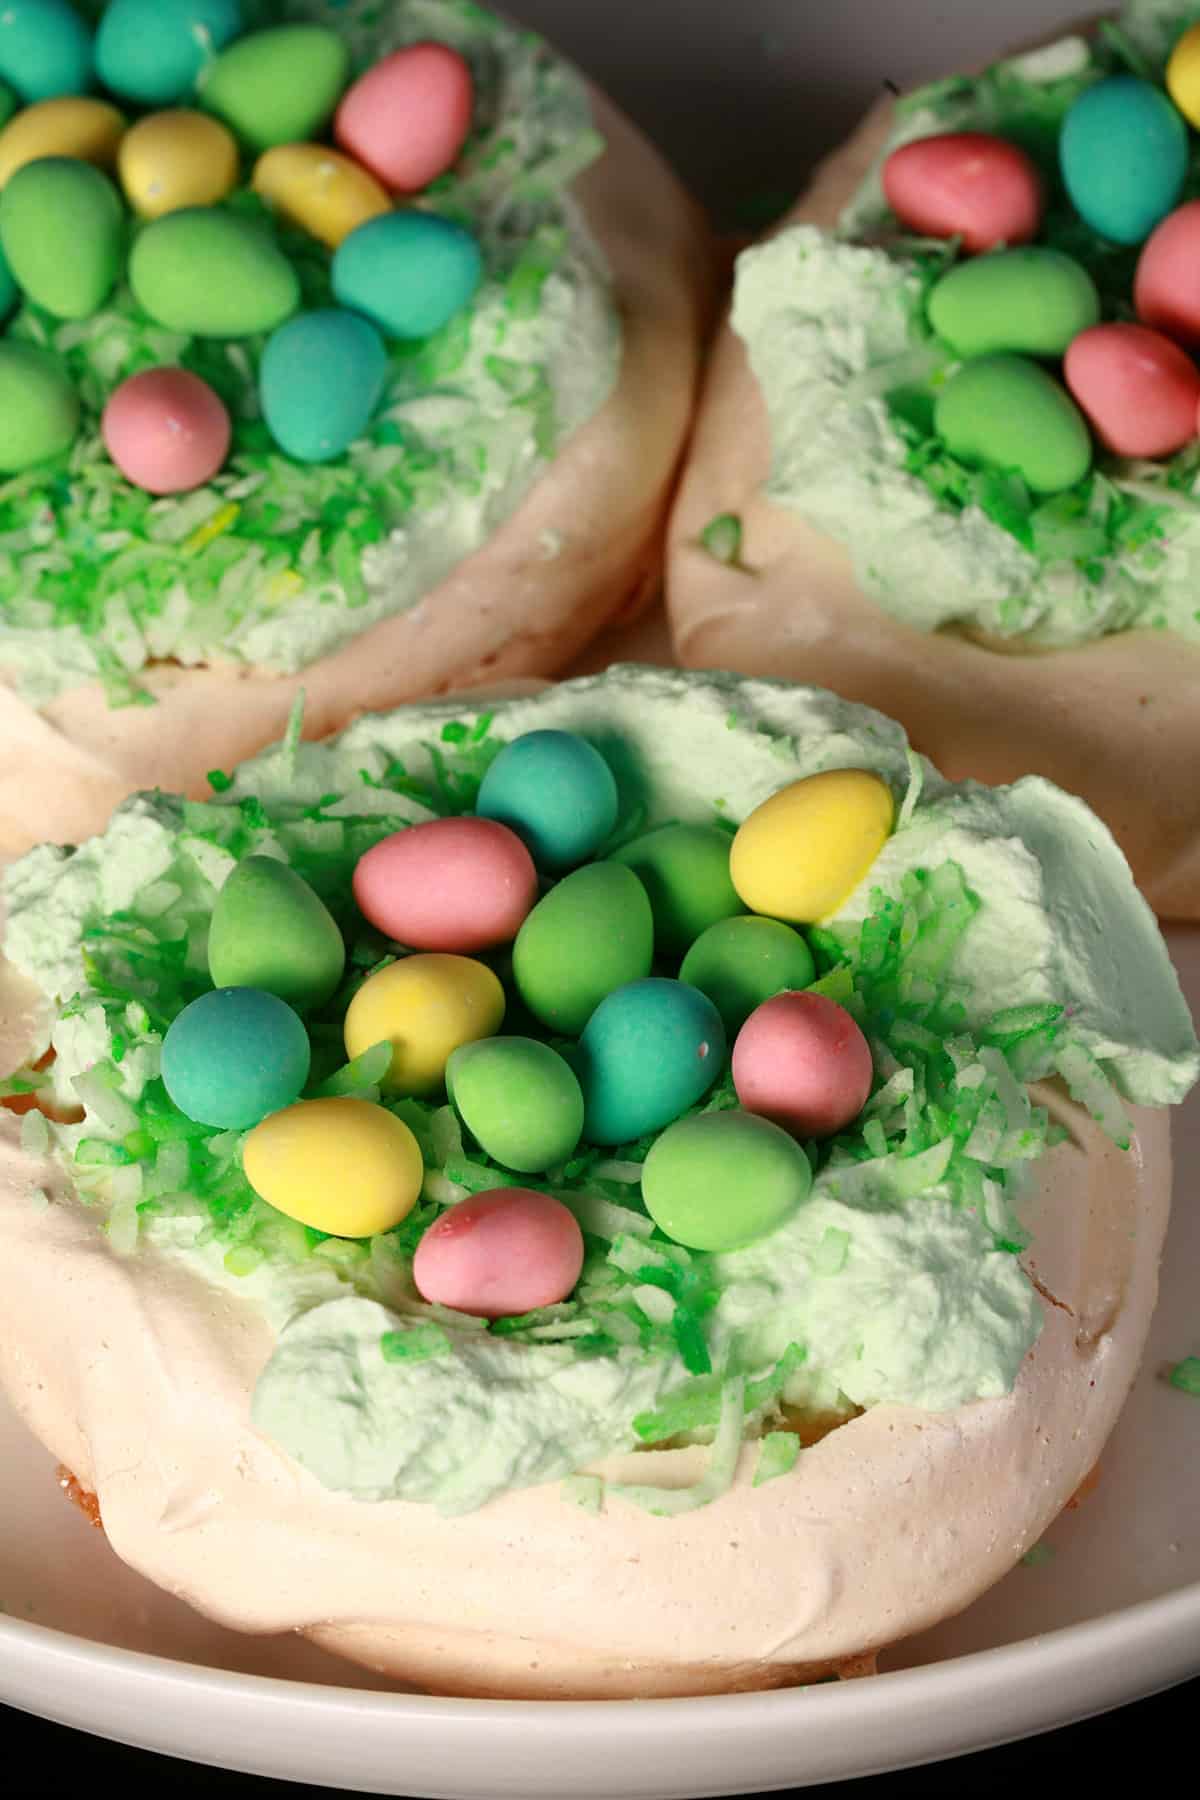
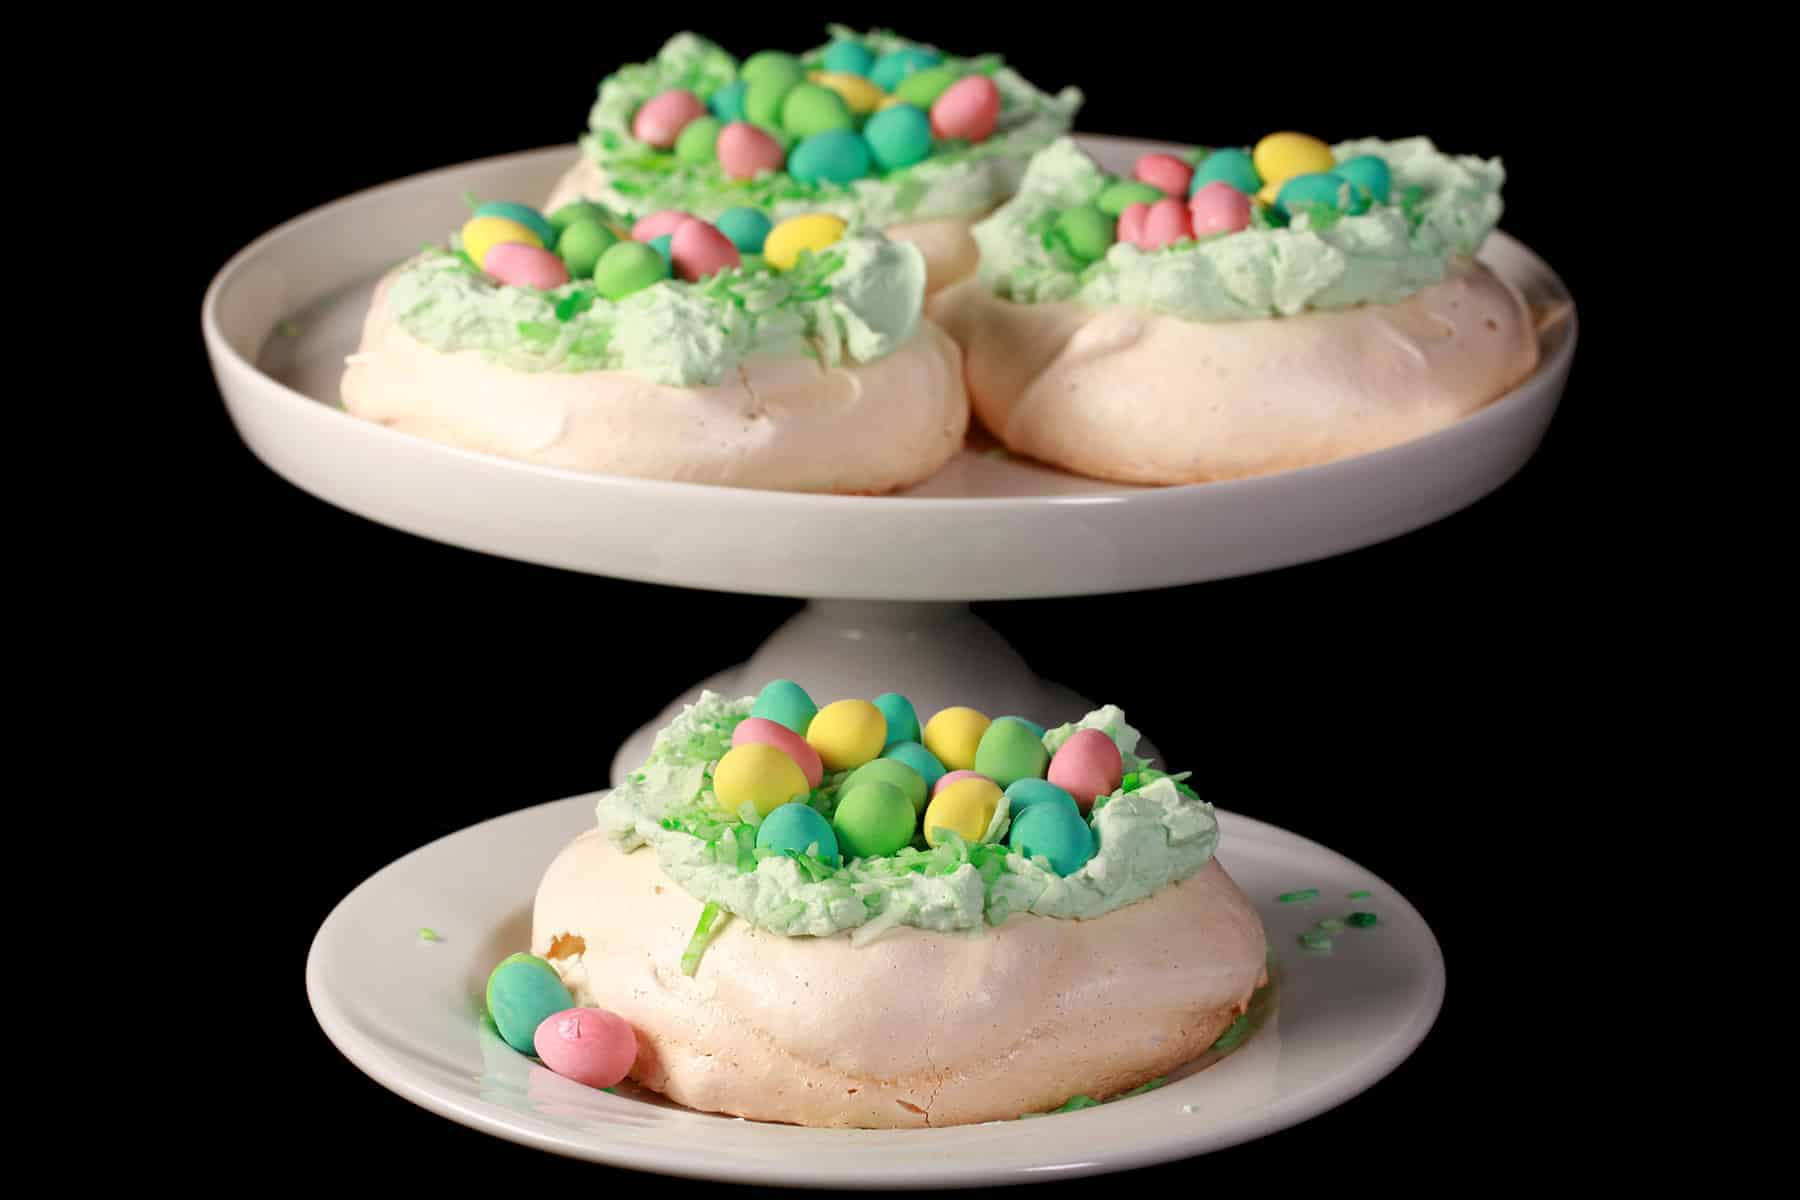
These Mini Easter Pavlovas may not be the most traditional pavlova, but they're super cute, fun to make, will be a hit with the whole family!

One of those easter recipes that got a makeover was my Easter Egg Pavlova.
The meringue base on that one is cooked into an egg shape, garnished with sliced fresh fruit and fresh berries. It’s the perfect Easter dessert for people like me who are absolute fiends about fruit.
I’d done it up last year, with the idea to used canned fruit, as a nod to the fruit salads and Jello salads I used to see at family Easter dinners, growing up.
It was ugly, so I redid it, Pysanky style.
This time around, my Easter baking is for the chocoholics and candy fans. The only fruit involved with this Easter meringue is a bit of coconut, and... does that really count?
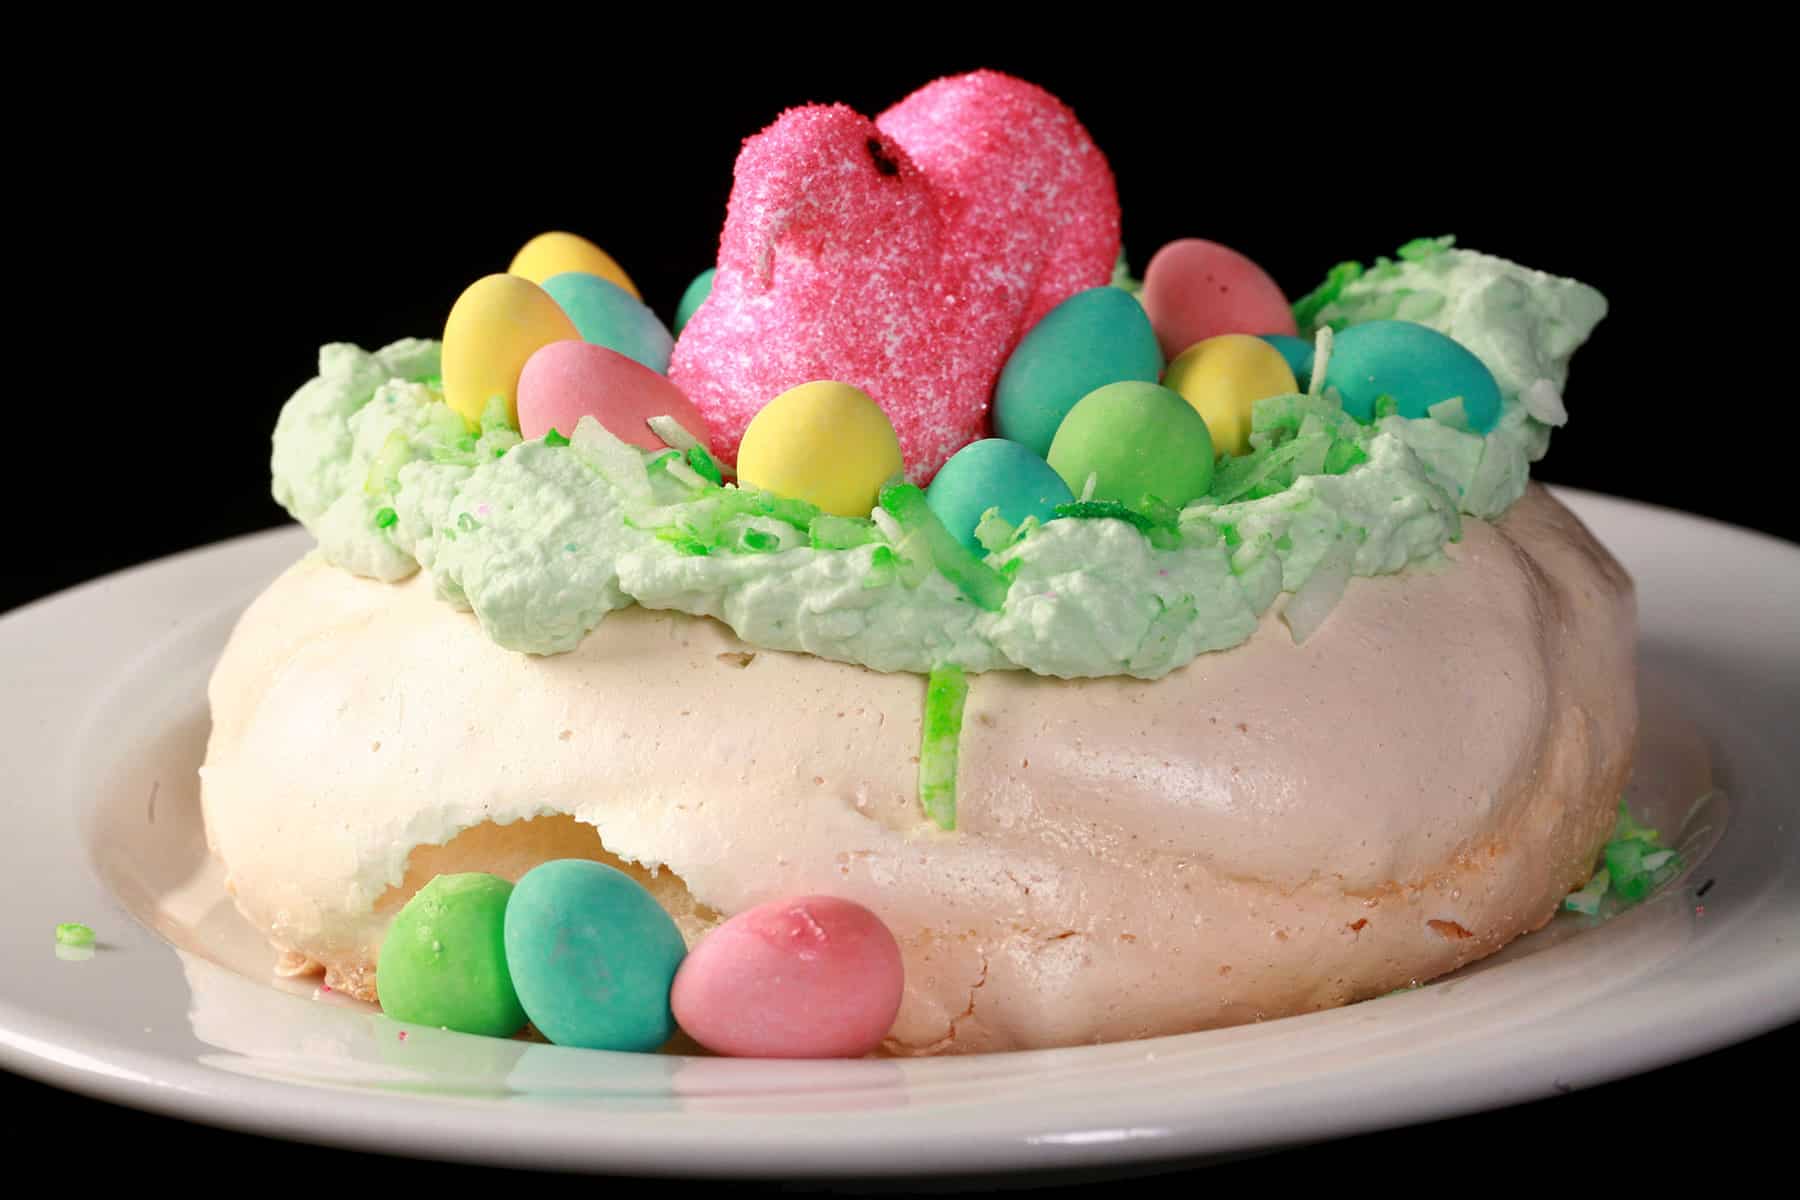
No, this time we’ve got chocolate Easter eggs, and - optionally - Peeps. (Try my Homemade Marshmallow Peeps!)
It’s a fun Easter dessert for the whole family - a gluten free Easter dessert, at that!
Let’s get to it...

Ingredients
This recipe uses really basic ingredients that should be available in pretty much any grocery store - some only during Easter season, though.
You will need:
Pantry Staples: Superfine Sugar / Castor Sugar, Sweetened Flaked Coconut Vinegar, Cornstarch, Pure Vanilla Extract, salt, food coloring.
Dairy, etc: Egg Whites, Heavy Cream .
Toppings: Cadbury Mini Eggs, Peeps (optional).
A few notes:
1. See below for how to make your own superfine sugar.
2. I use plain white vinegar, you can use white wine vinegar, apple cider vinegar, or even lemon juice, if you prefer.
3. Depending on where you are, heavy cream may be called heavy whipping cream, whipping cream, or double cream.
4. Peeps are optional, but fun. I used my Homemade Marshmallow Peeps.
5. I usually recommend gel food coloring, but I find liquid to work better for coloring the coconut. You want gentle mixing, getting gel distributed generally obliterates the coconut flakes.
6. If you don’t have green food coloring, use an equal amount of yellow and blue food coloring.
7. If you can’t bring yourself to throw out those leftover egg yolks, consider making some Passionfruit Curd or Lemon Curd!
The pale, pale creamy colour of such a curd is a common topping for traditional pavlovas, but doesn’t go so well with chocolate. If you want some curd with these pavlovas, I’d swap out the mini eggs in favour of some fruit jelly beans!

About Those Easter Eggs
If you need your Easter mini pavlovas to be gluten free, be careful with your choice of chocolate eggs.
While I’ve never had a problem with Cadbury Mini Eggs, I’m also not celiac. In my country, they don’t have any gluten containing ingredients, but they’re not actually certified GF.
If cross contamination is an issue, be sure to use Easter chocolates that are certified gluten free.
This will vary brand to brand, and even product to product within a brand. There are also sometimes differences in gluten free status for the same brand’s product, from country to country.
Always consult the packaging of the product that is available to you, in your location.

Tips to Get the Best Results
If this is your first time making pavlovas, there are a few tips you should know, to help you make the perfect pavlova.
1. Humid days are the enemy of meringue. The sugar attracts moisture from the air, leading to meringues that are less than crisp. Try to plan accordingly!
2. Super fine / castor sugar is granulated sugar with a much finer grain size than regular granulated sugar. Caster sugar is NOT powdered / icing sugar / confectioners' sugar! Super fine sugar is usually sold near the sugar in the baking aisle, in small boxes – sometimes resembling milk cartons.
If you aren’t able to find actual superfine sugar, you can process regular granulated sugar in your food processor until fine. Measure AFTER you process!.
4. You can add a little bit of cocoa powder to the meringue - along with the corn starch, etc - if you’d like. 2-3 tablespoon is generally good - just know that it does change the final texture of the inside of the meringues.
5. Meringues can be made a couple days ahead and stored in an airtight container until you’re ready to use it. Keep them in a room temperature or warm place, not the fridge.
For more pavlova making tips, see my How to Make a Pavlova tutorial.
How to Make Mini Egg Easter Pavlovas
The full recipe is in the recipe card at the end of this post, here is a pictorial walk through with additional tips and info.
Get ready: Preheat your oven to 250 degrees, set a rack in the middle of the oven.
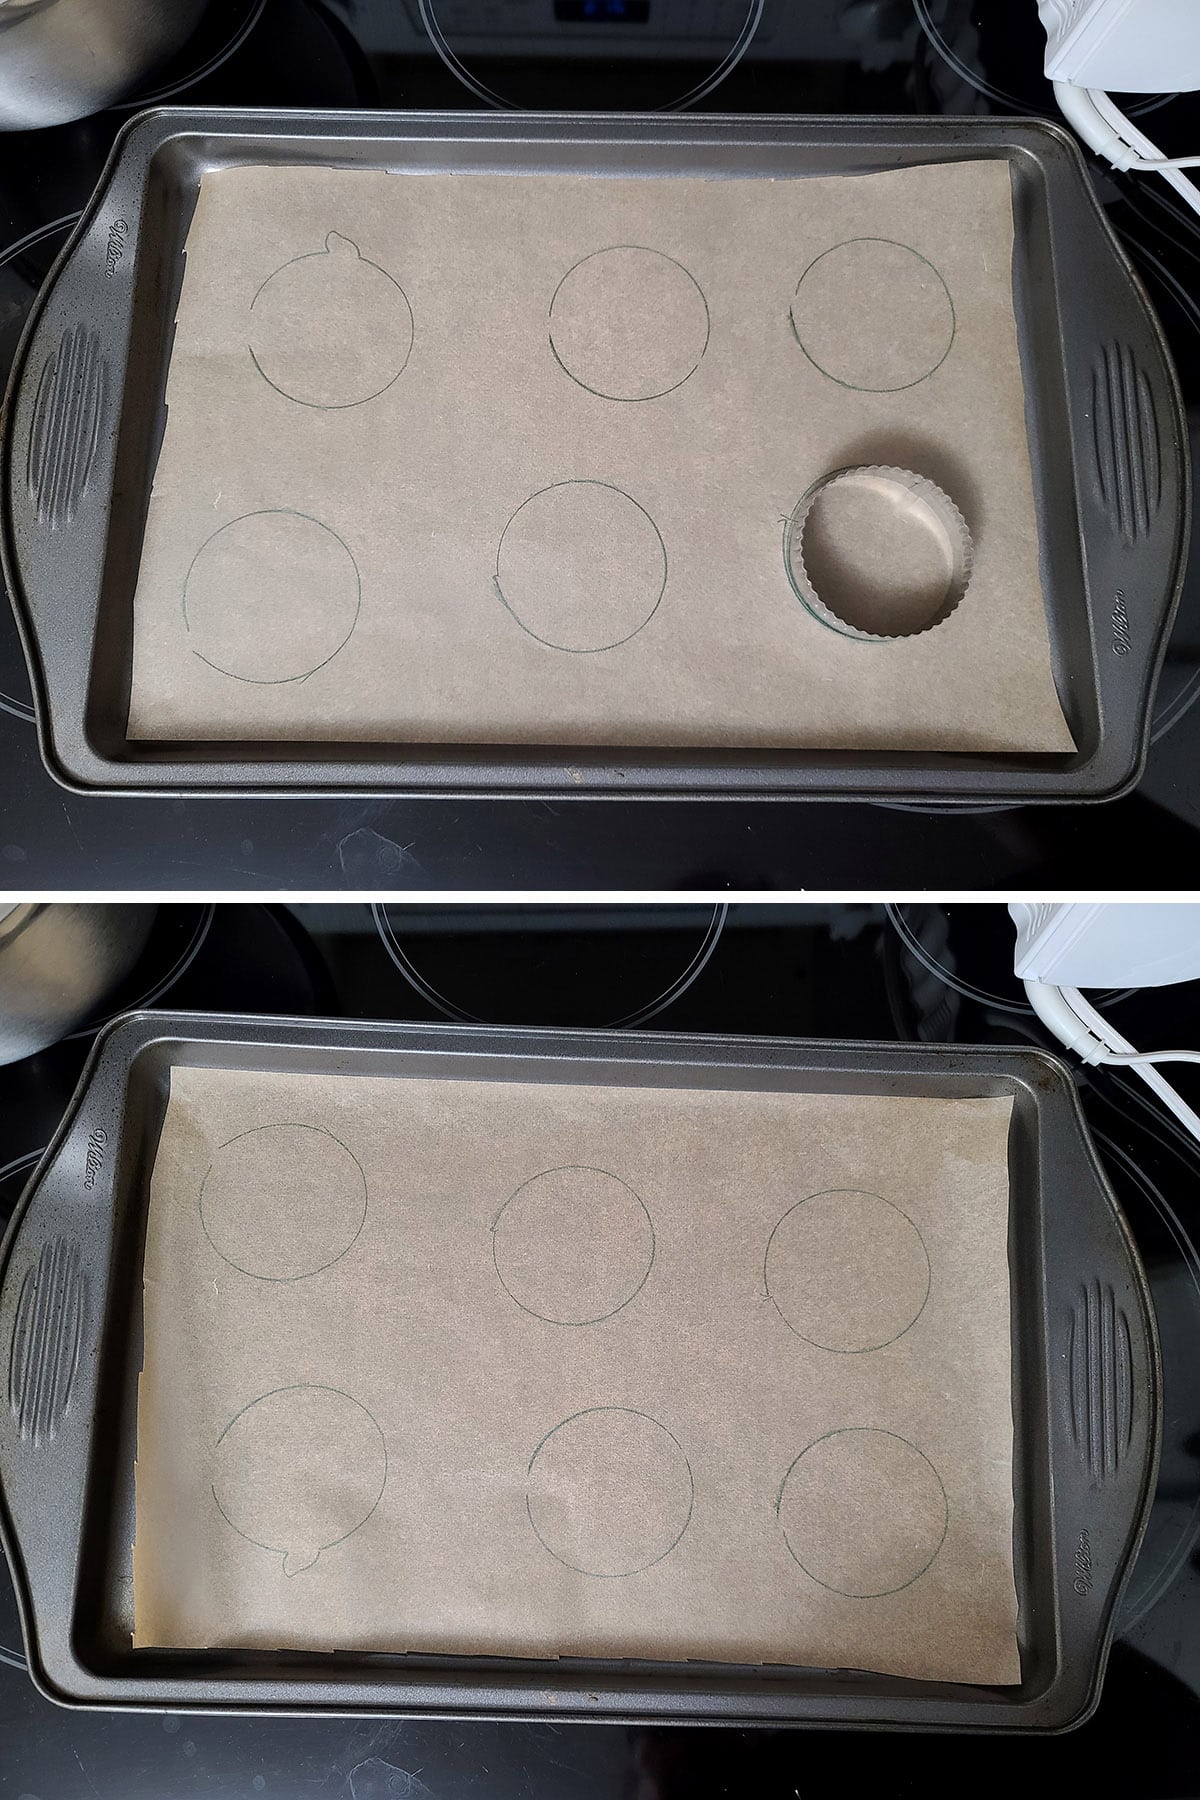
Line a large baking sheet with non-stick baking parchment. Optionally, use a large round cookie cutter to trace 6 circles on the parchment paper, about 3" in diameter (7.5 cm diameter circle).
Flip the paper over, marking side down, on the baking sheet, set aside.
Make the Meringues
Fit your hand mixer or stand mixer with the whisk attachment. Remove eggs from fridge, separate out the whites, and allow to warm to room temp (about 5 minutes).
In the bowl of an electric mixer - or a large bowl if using an electric whisk - whisk egg whites together with salt until soft peaks form - medium speed.
Slowly add in the sugar, a little at a time. Once all of the sugar is incorporated, turn the mixer up to high speed and continue whipping until stiff peaks form.
Note: You’ll know you’ve reached the correct consistency when the meringue mixture peak doesn’t flop over, when you invert the mixer whisks
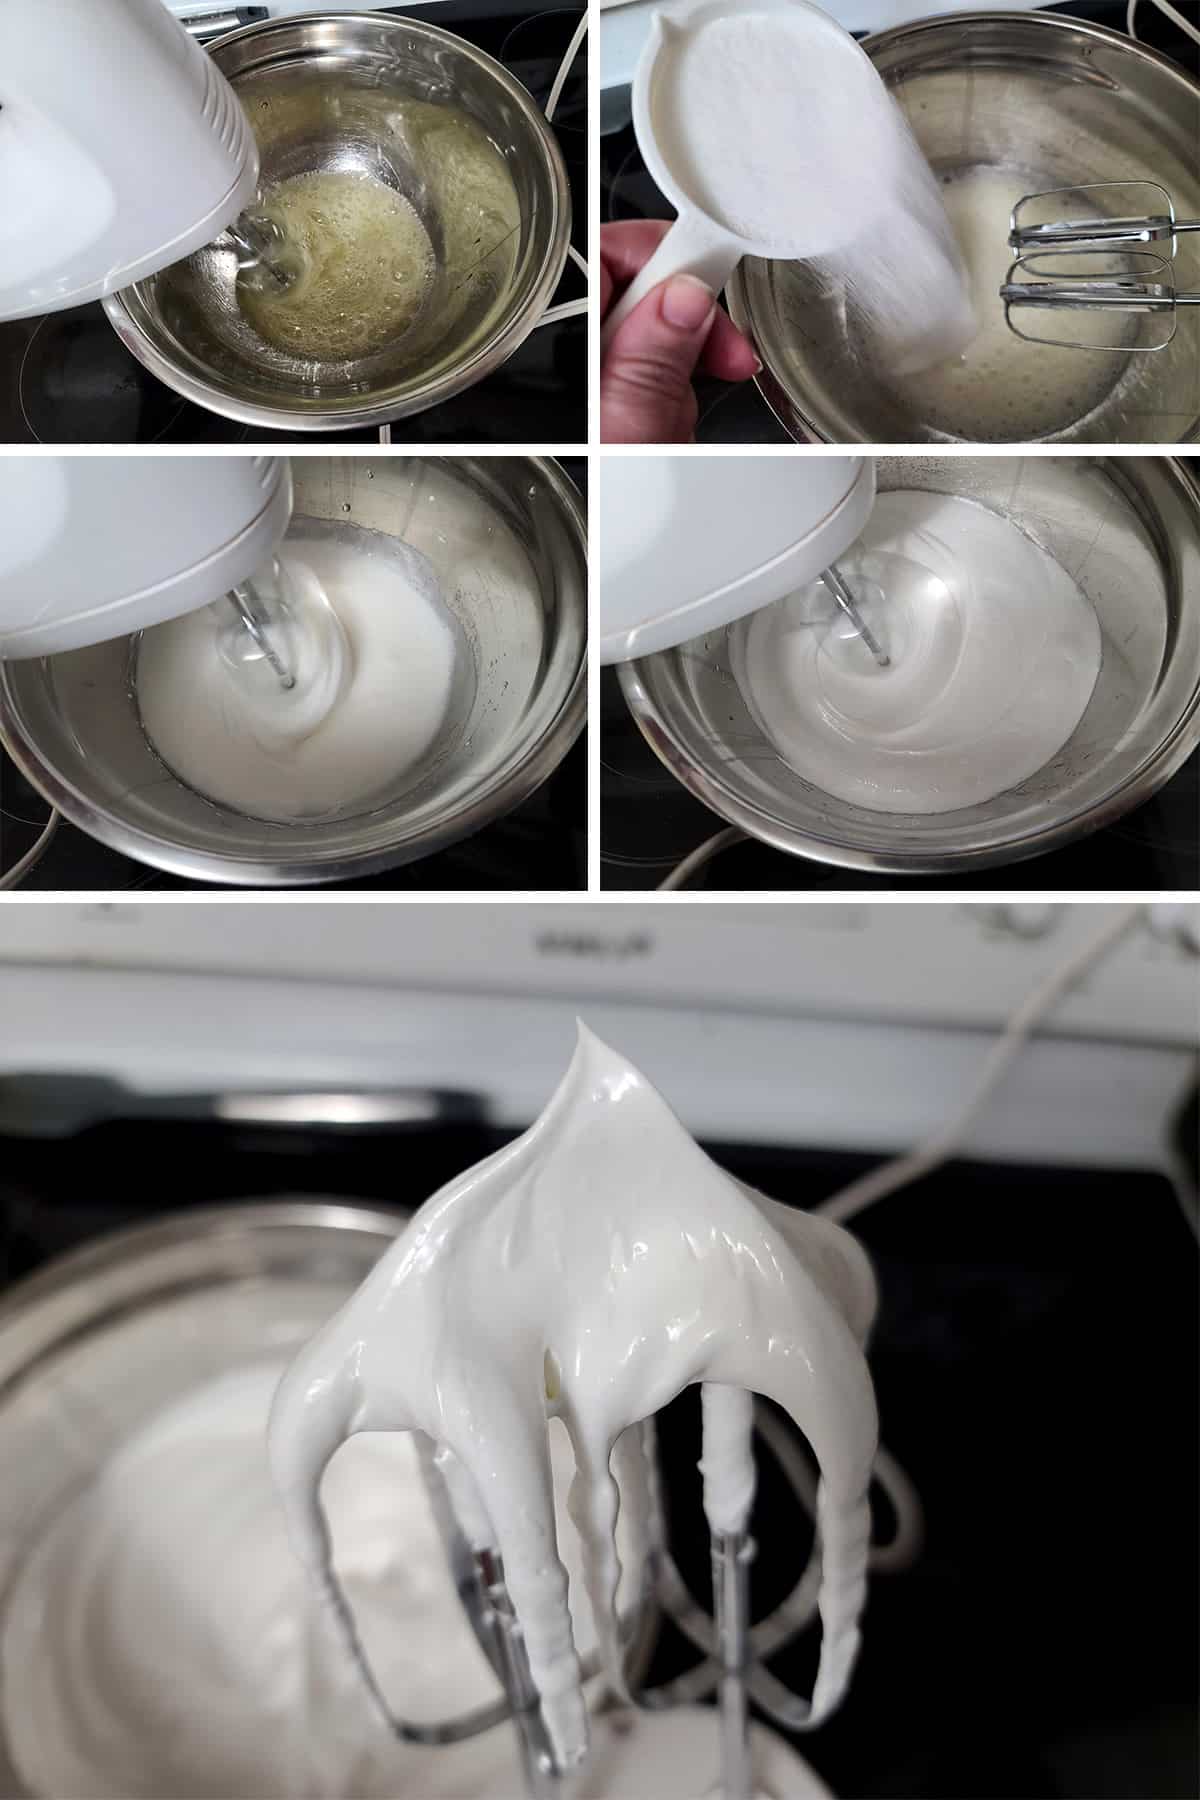
Sprinkle vinegar, cornstarch, and vanilla extract over meringue, gently fold in till combined.

Use the back of a spoon to swirl each meringue pile into a round shape with a slight indent in the middle. You may go a bit bigger than the traced circles - I just look at them as a rough guide for shape and placement.
Note: If you’re feeling fancy, you can pipe the meringue into circles with a piping bag. I don’t bother - and I kind of like the free form, messy meringue as the base for the nests!

Once your timer goes off, turn the oven off - without opening the oven door - and let the meringues cool in the oven for at least a couple of hours. That’s usually enough time for them to reach room temperature.
The baking of the meringues can be done the day before, if needed!
Assembly
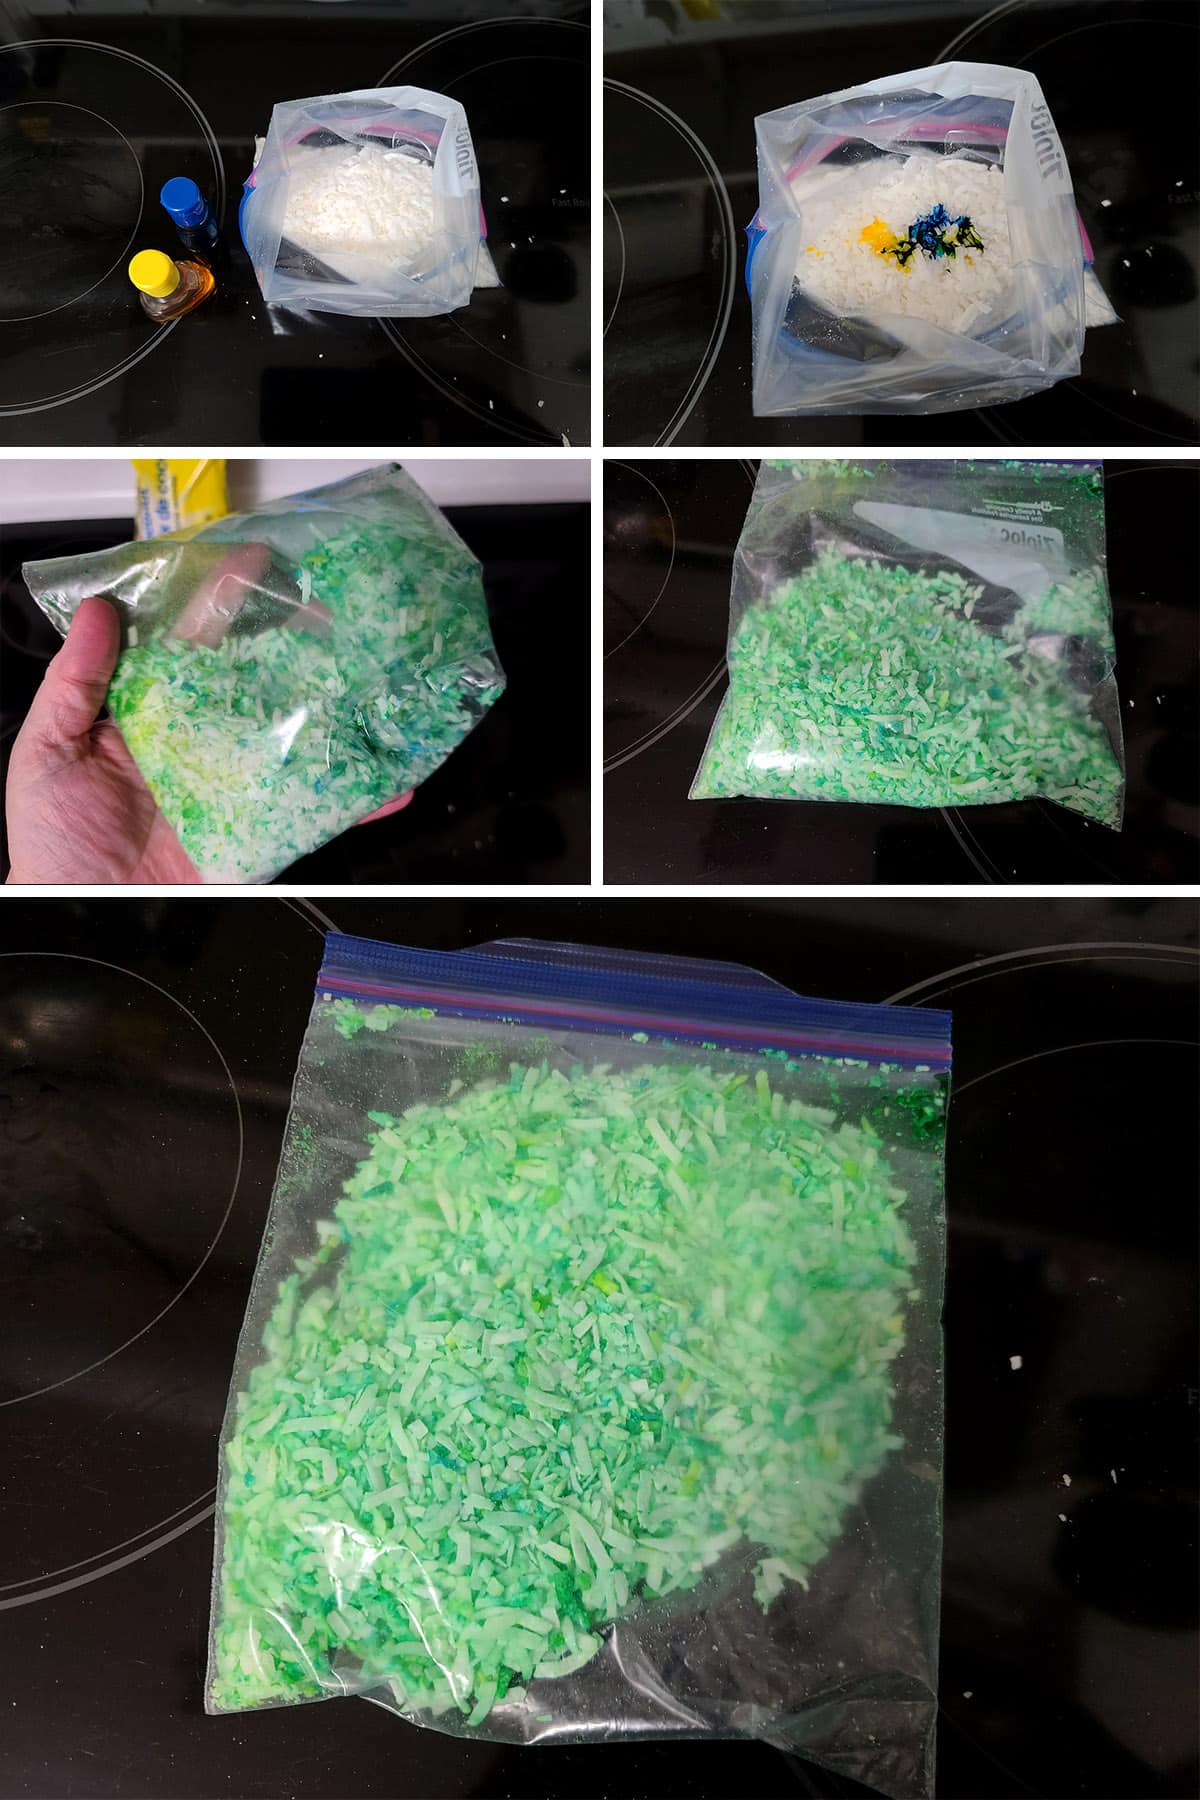
Place your coconut in a small plastic baggie, along with 15 or so drops of food coloring. Gently shake or massage to evenly distribute the colour.
Use an electric hand mixer in a glass bowl- or stand mixer with a whisk attachment - to whip heavy cream until soft peaks form. This usually takes 2-3 minutes, maybe less.
Once heavy cream is whipped to the desired thickness, add the vanilla extract and food colouring, mix until well incorporated.

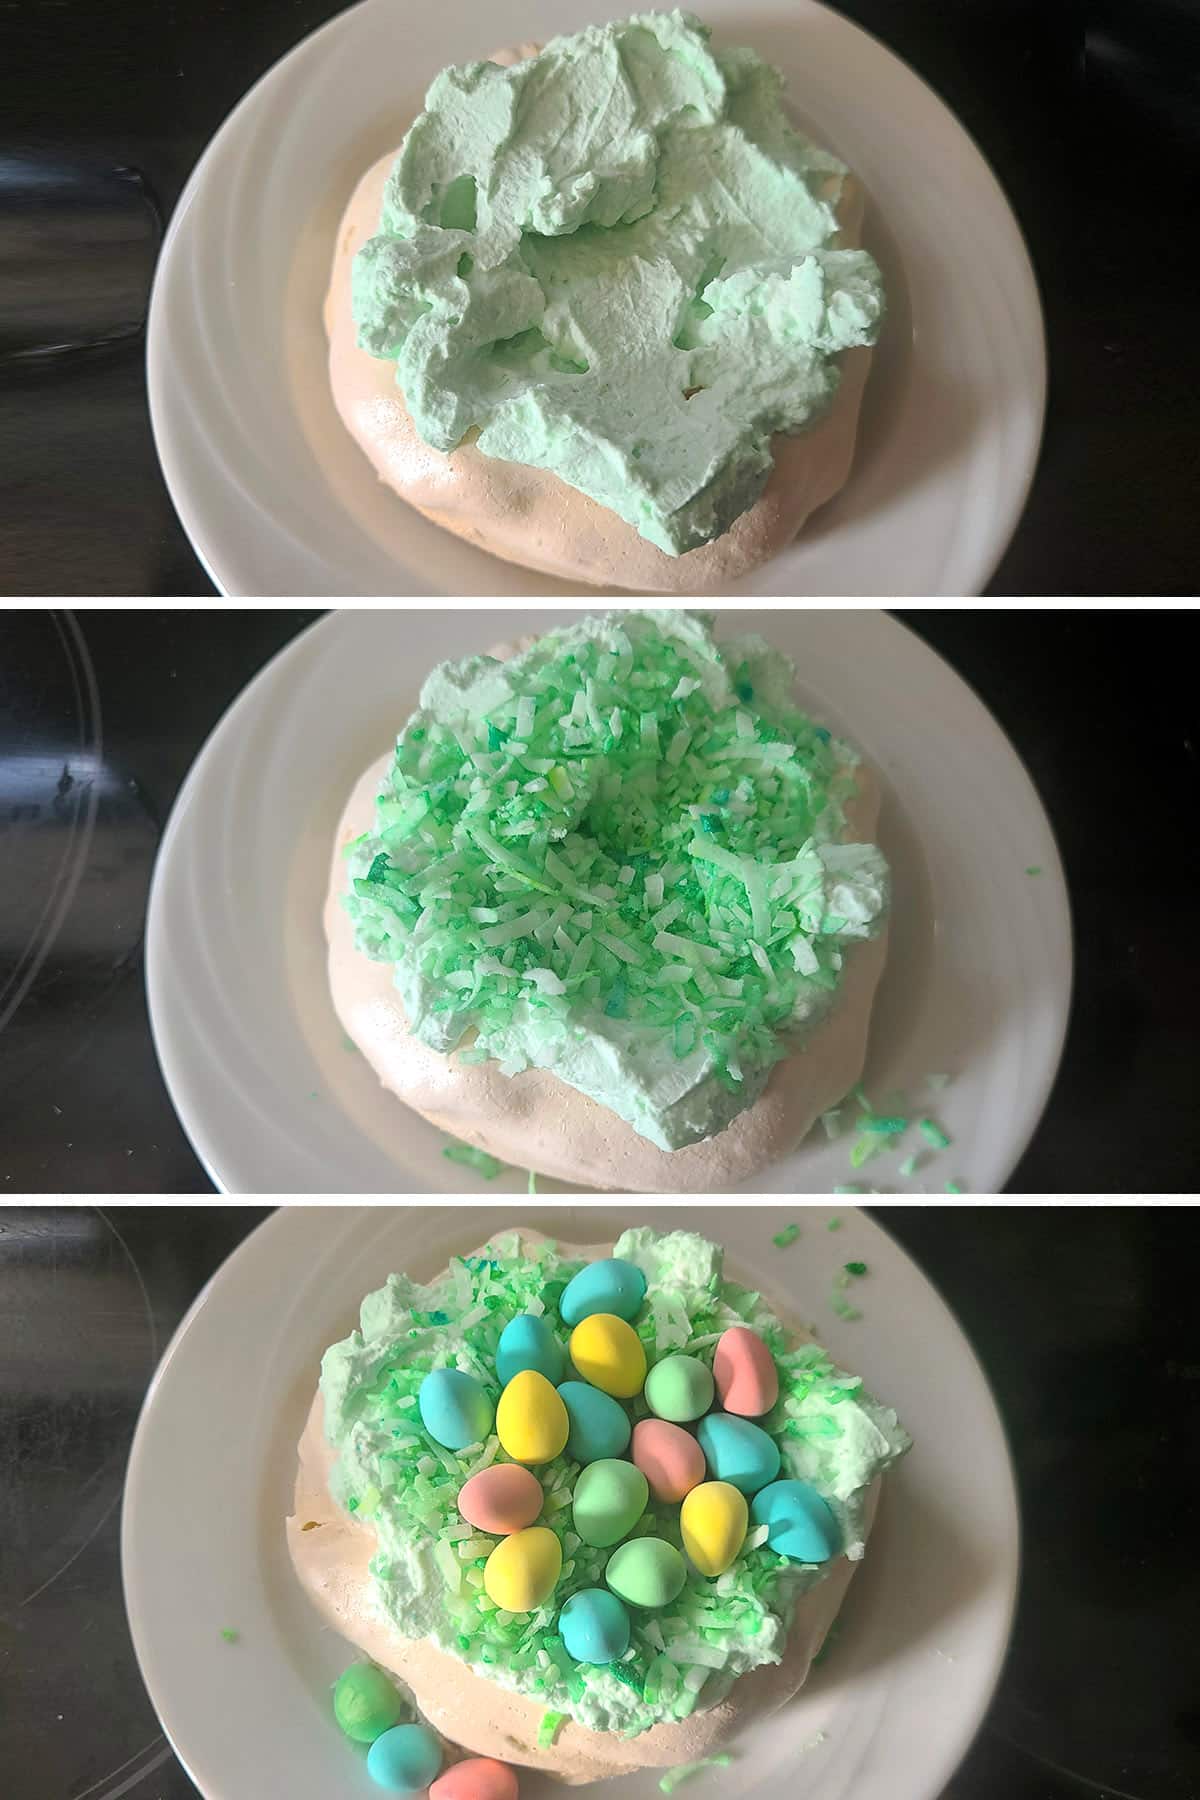
Spoon a delicate mount of whipped cream in the middle of the Pavlova, gently spreading it evenly over the top.
Sprinkle whipped cream with dyed coconut, top with mini chocolate Easter eggs, and Peeps, if you’re using them.
Repeat with remaining meringues, serve immediately!
Leftovers
Because meringues start to degrade once assembled, it’s best to only assemble as many as you’re going to be serving at the time - leftovers don’t really work, with this recipe.
That said, the baked meringues can be kept in an airtight container at room temperature for a few days, if needed. Assemble what you’re going to eat, save the rest to serve later!

More Gluten Free Easter Content!
Looking for more fun / tasty ways to observe Easter? Here are a few of my favourite recipes:
Chocolate Zombie Easter Bunnies
Easter Pavlova
Easy Pysanky [Epic Easter Eggs]
Gluten-Free Paska [Easter Bread]
Easter Deviled Eggs
Homemade Marshmallow Peeps
Keto Paska
Southern Comfort Glazed Ham
Share the Love!
Before you chow down, be sure to take some pics of your handiwork! If you post it to Bluesky, be sure to tag us - @CelebrationGen. We're also on Pinterest, so you can save all your favourite recipes to a board!
Also, be sure to subscribe to my free email newsletter, so you never miss out on any of my nonsense.
Finally, if you love this recipe, please consider leaving a star rating and a comment, and/or sharing the link on social media!
Easter Pavlovas
Equipment
- Large Baking Sheet
- Parchment Paper
Ingredients
The Meringues
- 4 Large Egg Whites
- Pinch Salt
- 1 cup Super Fine / Castor Sugar *
- 2 teaspoon Vinegar
- 1 teaspoon Cornstarch
- 1 teaspoon Pure vanilla extract
The Topping
- 1 ¼ cups Sweetened Flaked Coconut
- Green food coloring or blue and yellow food colouring
- Cadbury Mini Eggs
- 6 Peeps optional
The Whipped Cream
- 1 ¼ cup Heavy Cream
- 1 teaspoon Pure vanilla extract
- Green Food colouring optional
Instructions
The Meringues
- Get ready: Preheat your oven to 250 degrees.
- Line a baking (cookie) sheet with parchment paper. Optionally, use a large round cookie cutter to trace 6 circles on the parchment paper, about 3" in diameter. Flip the paper over, marking side down, on the baking sheet, set aside.
- Fit your electric mixer or stand mixer with the whisk attachment. Remove eggs from fridge, separate out the whites, and allow to warm to room temp (about 5 minutes).
- In your mixer bowl, beat egg whites together with salt until glossy peaks form.
- Slowly add in the sugar, and continue whipping until stiff peaks form. Turn off mixer, remove bowl.
- Sprinkle vinegar, cornstarch, and vanilla extract over meringue, gently fold in till combined.
- Divide the meringue evenly between the circles. Use the back of a spoon to swirl each meringue pile into a round shape that’s a little concave in the middle. You may go a bit bigger than the traced circles - I just look at them as a rough guide for shape and placement.
- Bake the meringues for 50 minutes,
- Once your timer goes off, turn the oven off - without opening the oven door - and let the meringues cool in the oven for several hours. The baking of the meringues can be done the day before, if needed!
Assembly
- Place your coconut in a small plastic baggie, along with 15 or so drops of food coloring. Gently shake or massage to evenly distribute the colour.
- Just before serving, prepare the whipped cream - Use an electric hand mixer - or stand mixer with a whisk attachment - to whip heavy cream until soft peaks form.
- Once heavy cream is whipped to the desired thickness, add the vanilla extract and food colouring, mix until well incorporated.
- Mound a little whipped cream on each pavlova, gently spreading it evenly over the top.
- Sprinkle whipped cream with dyed coconut, top with mini chocolate Easter eggs, and Peeps, if you’re using them.
- Serve immediately!
Notes
Nutrition


Leave a Reply