

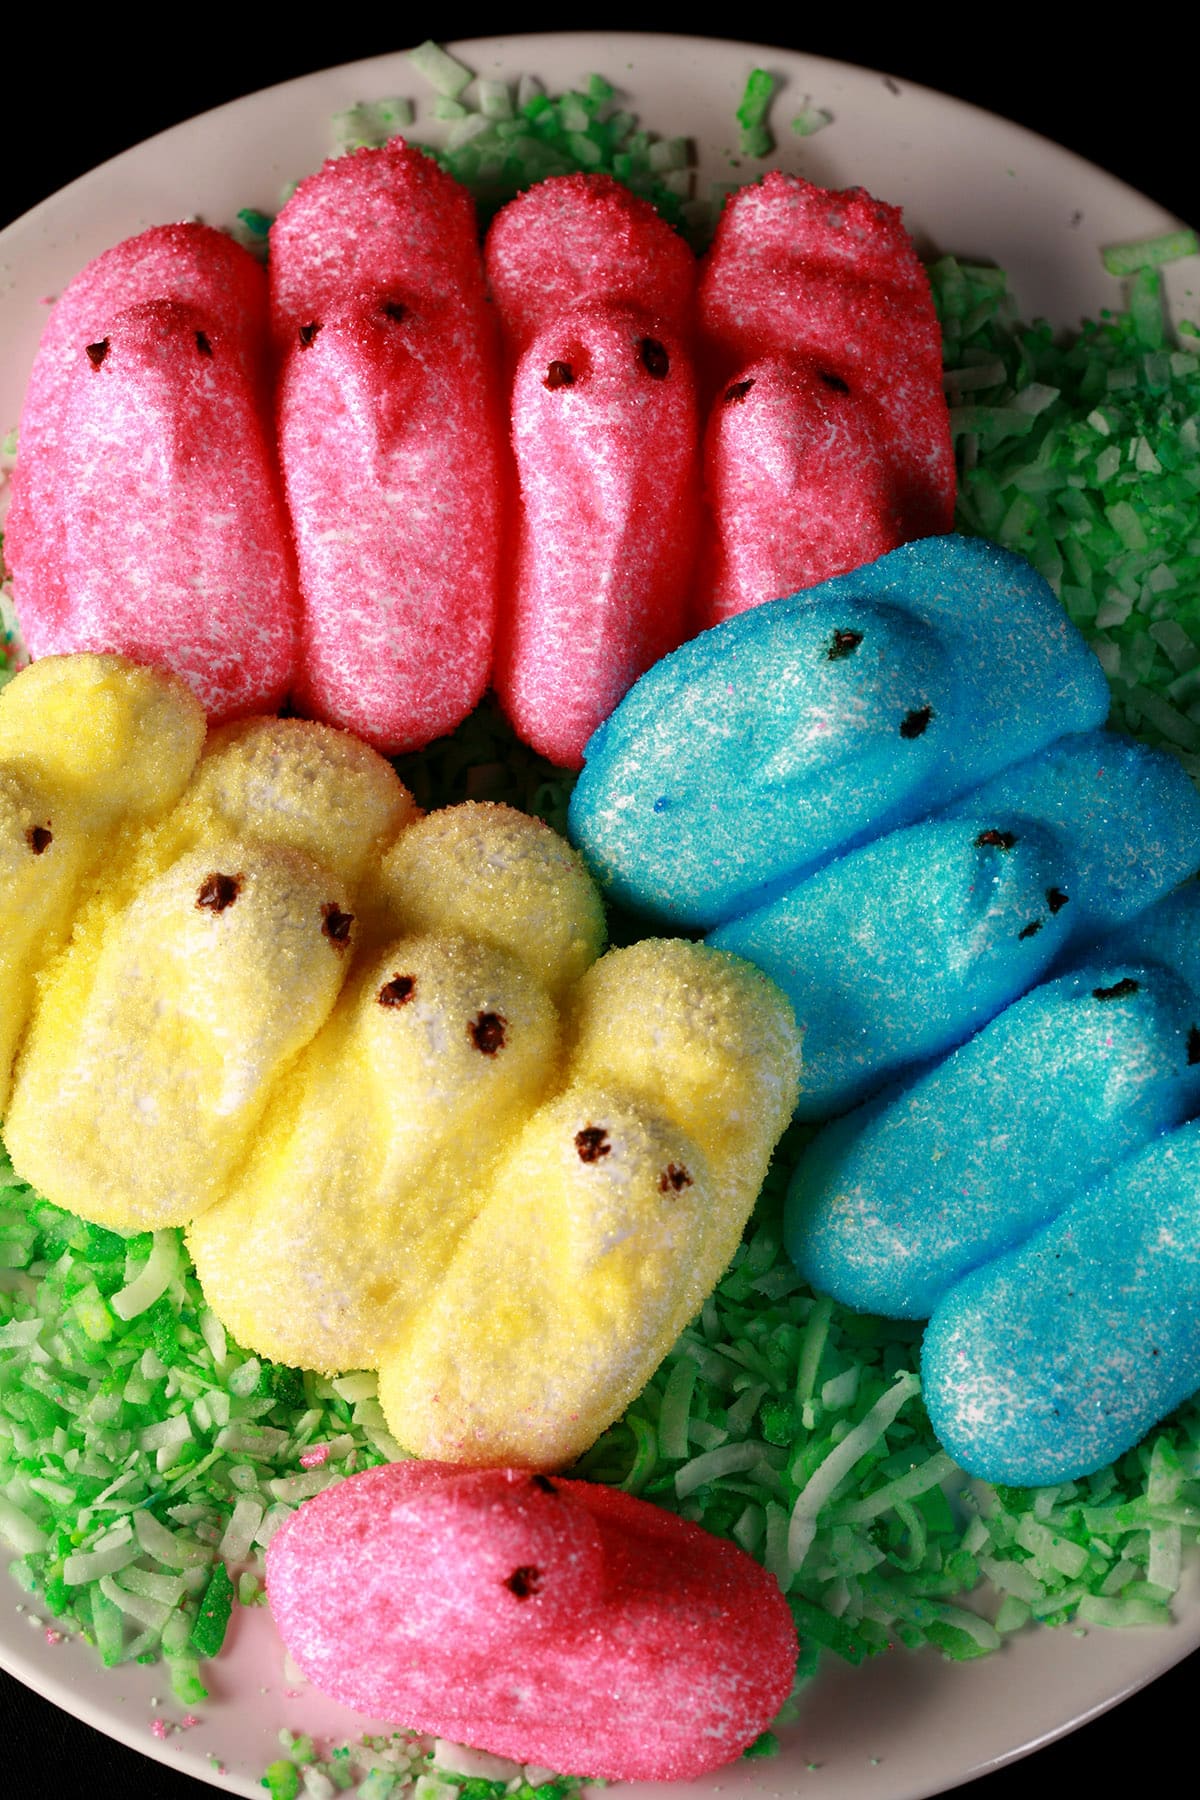
Homemade Peeps are not only customizable, cute, and fun to make, they also taste WAY better than storebought. Here's my Peeps recipe!

Love it!
Today’s post is a really simple recipe for a fun Easter treat - homemade marshmallow Peeps!
My Easter peeps recipe starts out with the same basic marshmallow recipe that formed the base of my Marshmallow Cones recipe (not Gluten-free).
This delicious recipe is sure to satisfy any sweet tooth, and tastes way better than regular marshmallows.
Making your own marshmallow is a fun treat for any fan of Peeps - so much fun to pipe, decorate, AND to eat!
Eventually, I’ll get some Peeps recipes up that are suitable for other holidays and seasons 🙂
Anyway...
This marshmallow Peeps recipe makes about 20 Peeps.
You can double the recipe to make more, but I wouldn’t increase the recipe beyond that - you may burn out your mixer if you try to whip a much larger batch.
Better to just make multiple batches of this fun treat!
Speaking of which, if you find yourself with leftover peeps, you can have some fun incorporating them into other favourite treats.
Plop a peep or two in those nest shaped rice krispie treats, or do what we did, and add leftover marshmallow to my Mini Egg Easter Pavlovas!
Anyway, on to that recipe - and tutorial!
All you need is:
Granulated sugar
Unflavored Gelatin Powder
Pure Vanilla Extract
Unsweetened Cocoa Powder
Salt
Food coloring
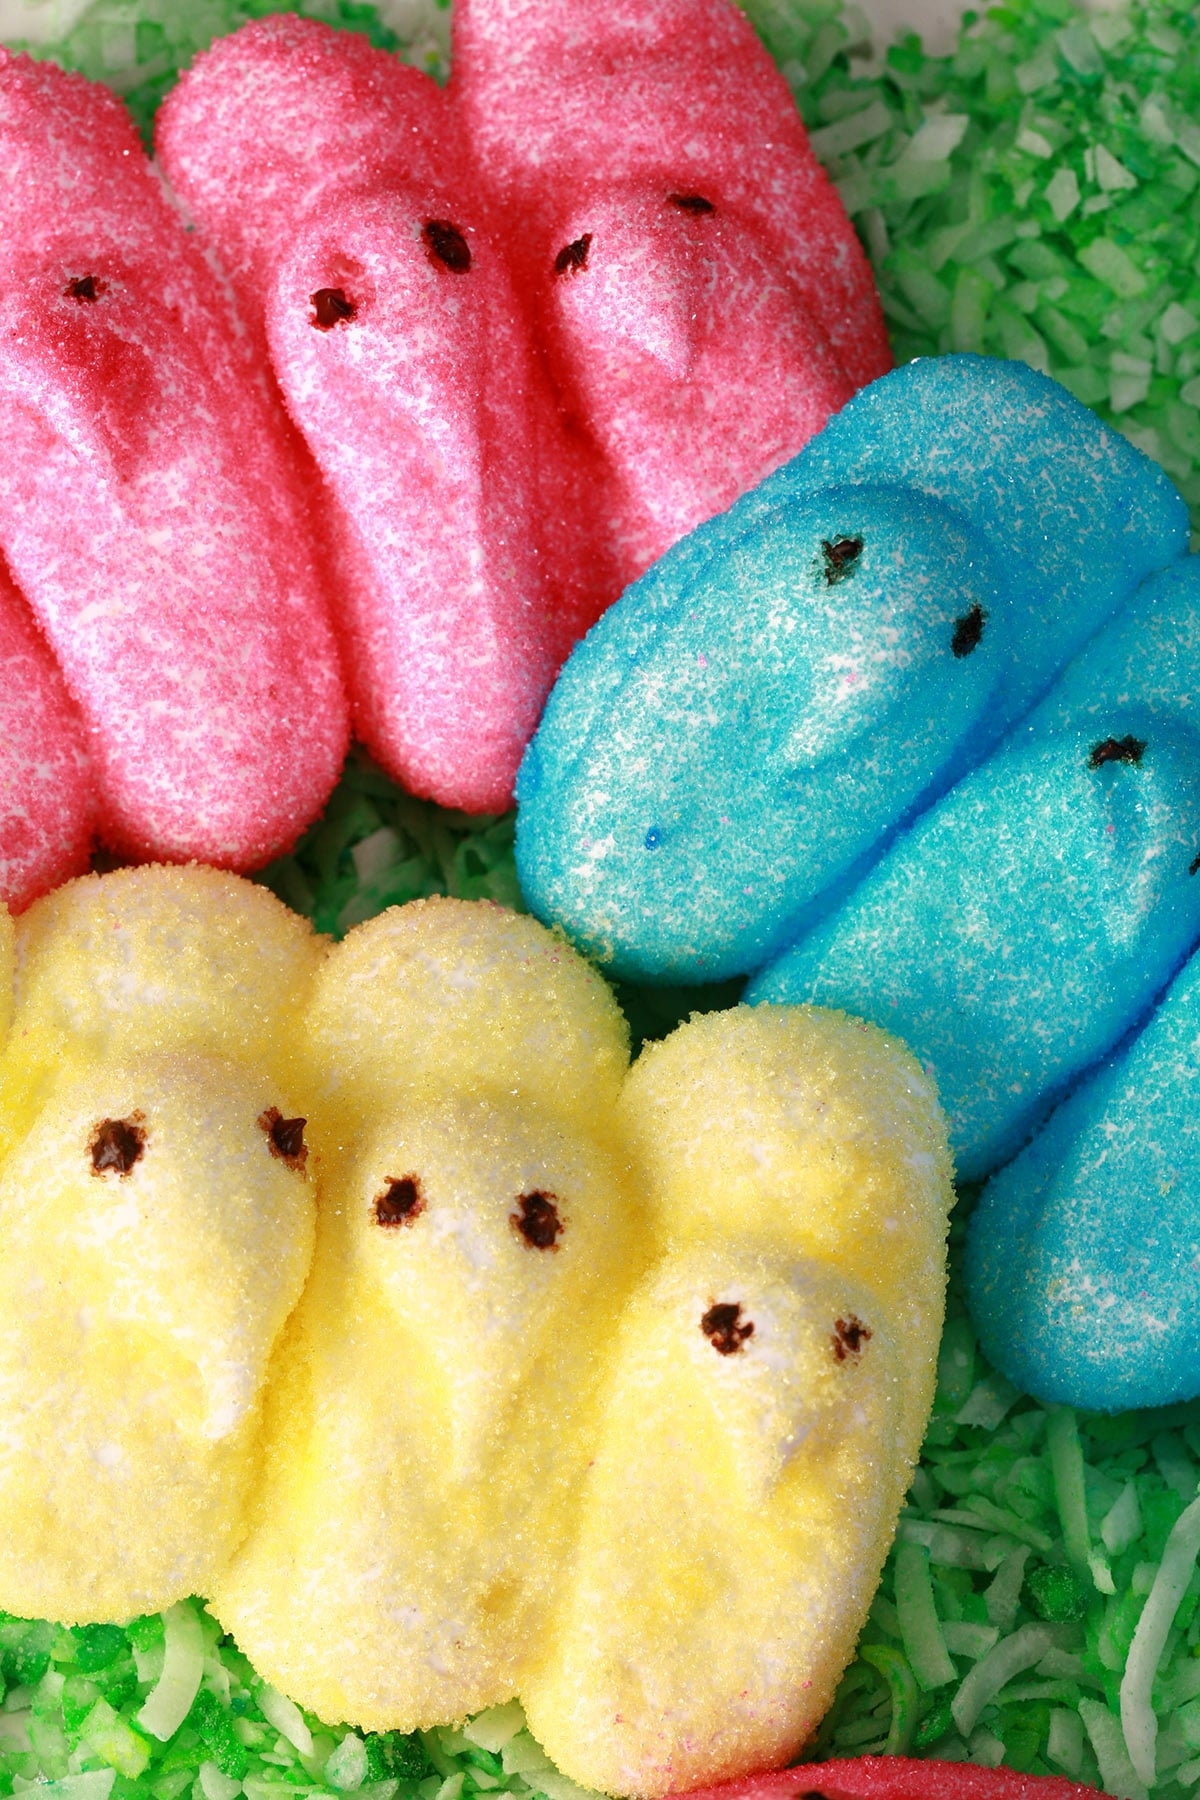
While yellow Peeps are seen as the classic Easter candy, I like to color these little guys in different colors - IMHO, homemade peeps should be a COLORFUL Easter treat!
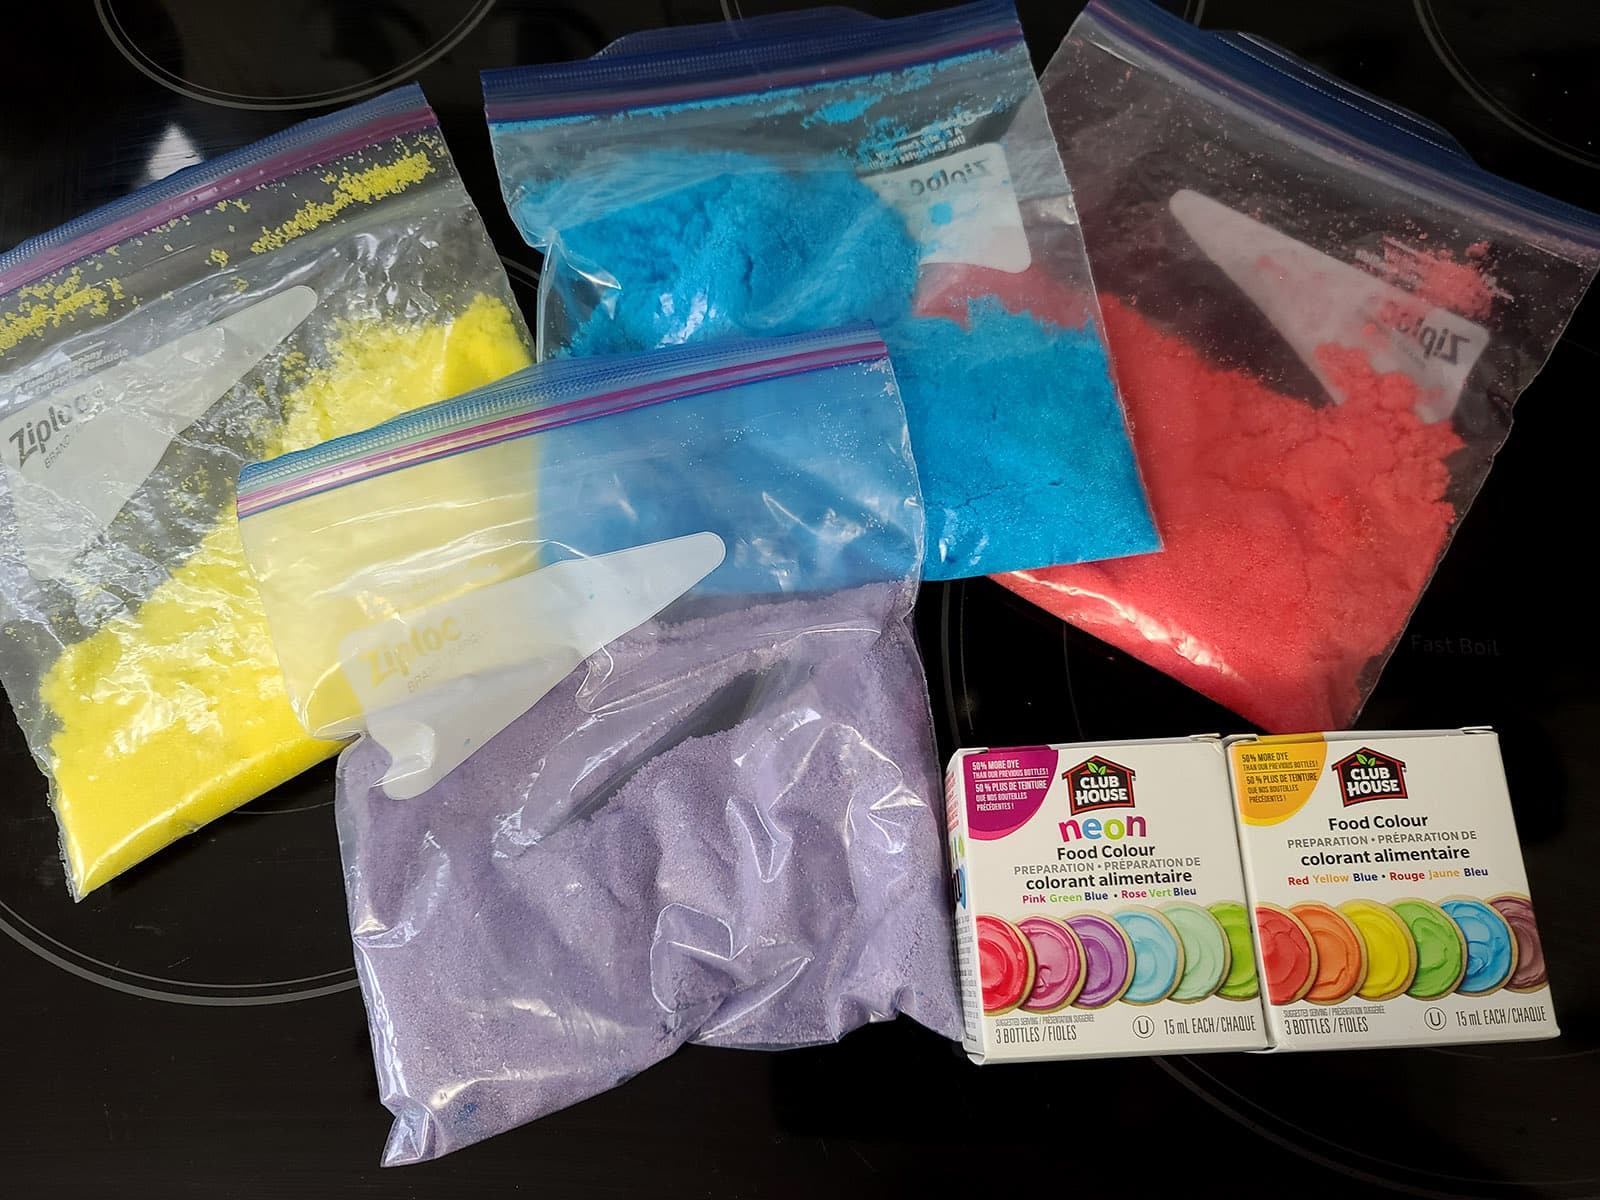
My favorite way to do this is to just color my own sugar - it takes only a few seconds of effort per color.
I just shake the sugar and dye together in plastic baggies, but you can run it through a mini food processor, if you prefer.
While I usually use gel coloring, this time around I used liquid.
It distributes even more quickly and easily - you’ll just want to give the bags a good shake / massage right before using, in case it dried / clumped while you were making the homemade marshmallow.
Want to save the effort? You can use premade sanding sugar if you’d like.
Equipment
In addition to the basic ingredients, you’ll need a few pieces of kitchen equipment and supplies to make these:
1 - A mixer. You can use a Stand Mixer with a whisk attachment or - if you’re looking for a workout - an Electric Hand Mixer.
2 - A Candy Thermometer. This is how you’ll keep track of the sugar syrup temperature.
3 - Large Pastry Bags. I use one per batch of homemade marshmallow recipe.
Note: I don’t bother with couplers or decorating tips. You really don’t need it, and cleaning the sticky marshmallow off them is a pain!

How to Make Homemade Peeps
The full recipe is in the recipe card at the end of this post, here is the pictorial walk through, with some additional details and info.
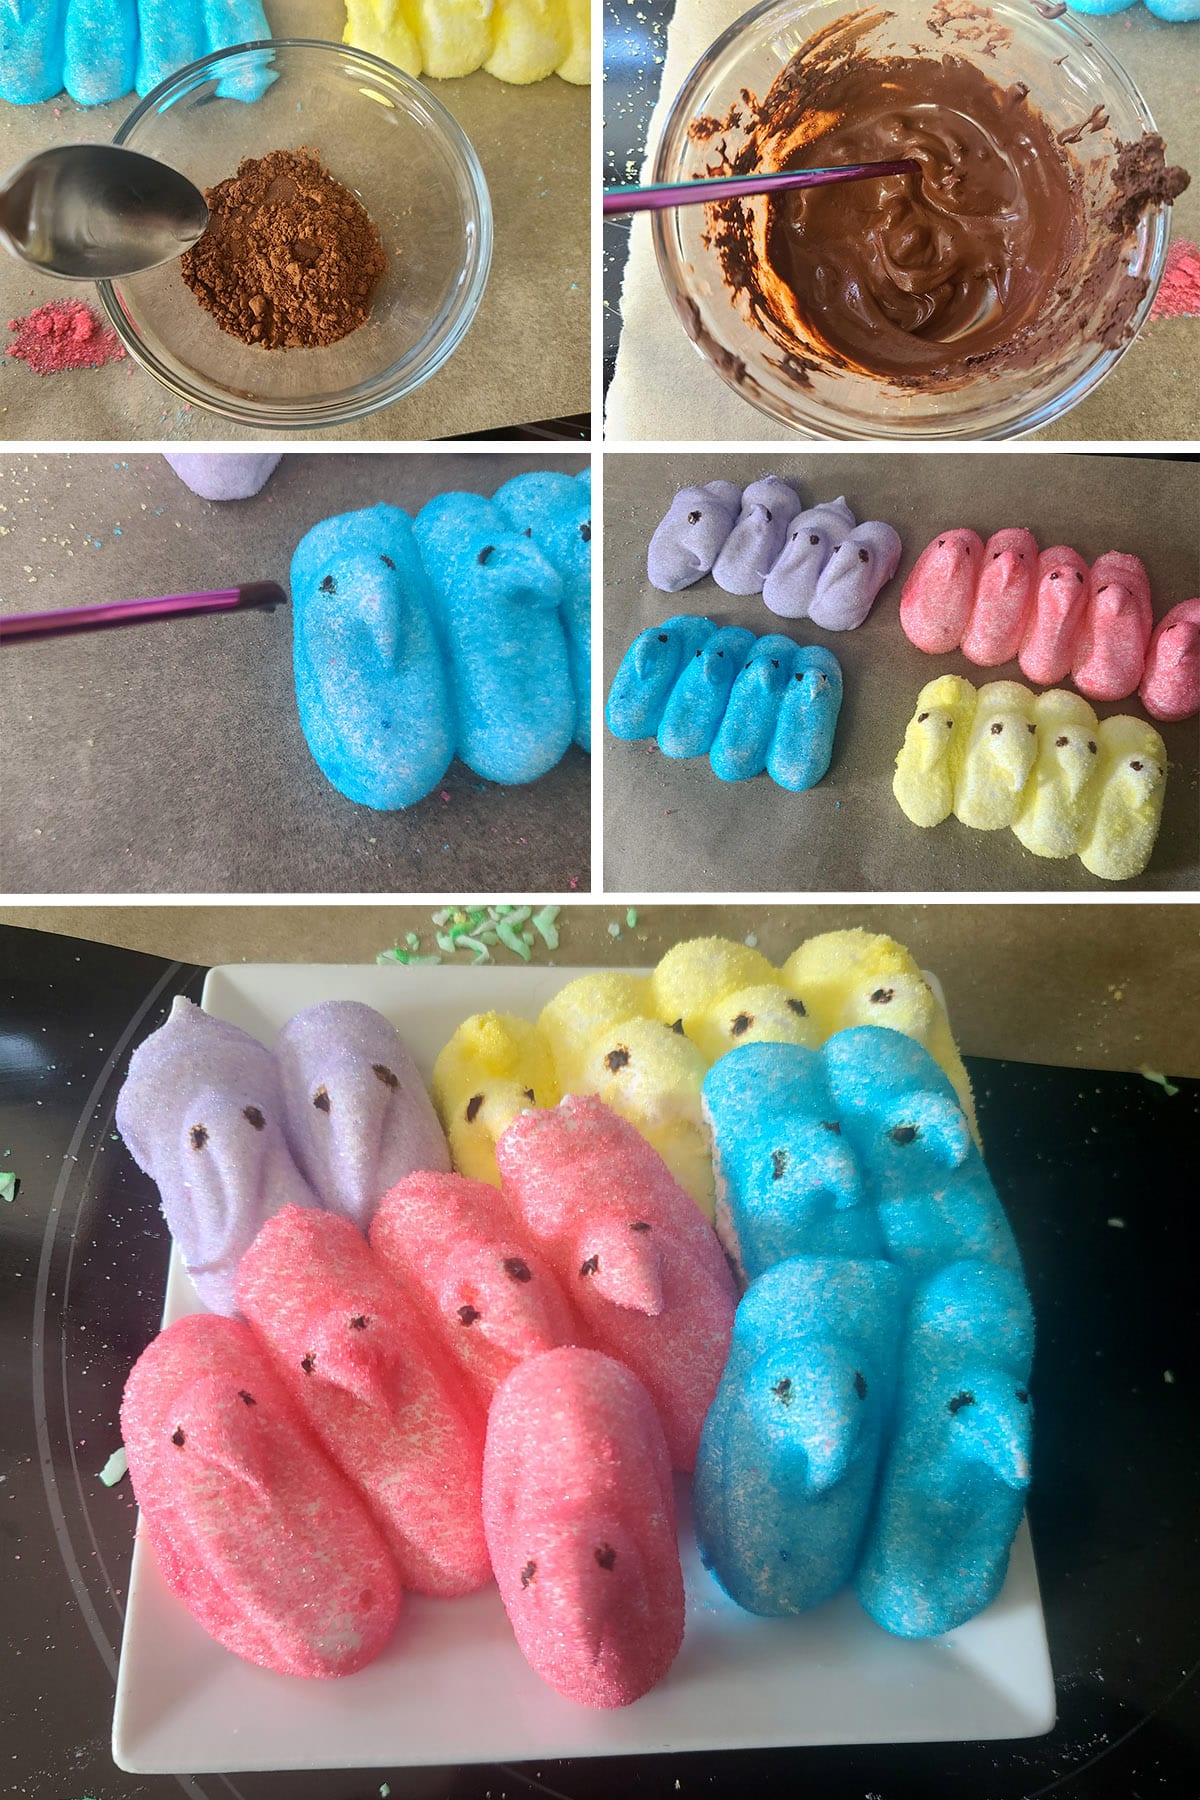
Dye the Sugar
Place sugar in a plastic baggie - 1 bag, ¾ cup sugar for each colour you plan to use.
Add a drop or two of food colouring to each bag, press most of the air out of the bag, and seal with the zipper.
Gently massage the sugar around to distribute the food colouring evenly throughout the sugar, taking care to break down any clumps.
Once the colour is evenly distributed with no clumping, set bags aside.

Make the Marshmallow
In a bowl, sprinkle the gelatin over ¼ cup of cold water, set aside.
In medium saucepan (Use a large saucepan if doubling the recipe!), combine the 1 cup of sugar, with remaining ¼ cup of water and salt.
Cook over medium heat, stirring constantly, until sugar is dissolved. Use a wet pastry brush to wash down the sides of the pan.
Bring to a boil and continue to cook – without stirring – until sugar mixture reaches 240°F (soft ball stage) on a candy thermometer.
Remove from heat and add gelatin mixture, stirring until dissolved and completely combined, with no lumps of gelatin.

Let the mixture cool for 5 minutes.
Beat sugar syrup in the stand mixer bowl (or with a hand held electric mixer) on medium-high speed until it becomes opaque/white.
Use a rubber spatula / silicone spatula to scrape down the sides of the bowl every once in a while.
Once syrup is no longer clear, add the vanilla and turn the mixer speed up to high speed.
Continue whipping the syrup until the marshmallow mixture is thick, white, glossy, and almost triple the original volume. This may take up to 10 minutes.

Pipe your Peeps
Carefully spoon the marshmallow into a large pastry bag.
Note: You can fit your bag with a coupler set and a large round tip - I don’t bother, personally.

Give each bag of coloured sugar a quick shake / massage to break up any clumps of dried sugar.
Transfer half of each sugar color to individual plates - or a small baking sheet lined with parchment paper - for piping. Set aside.

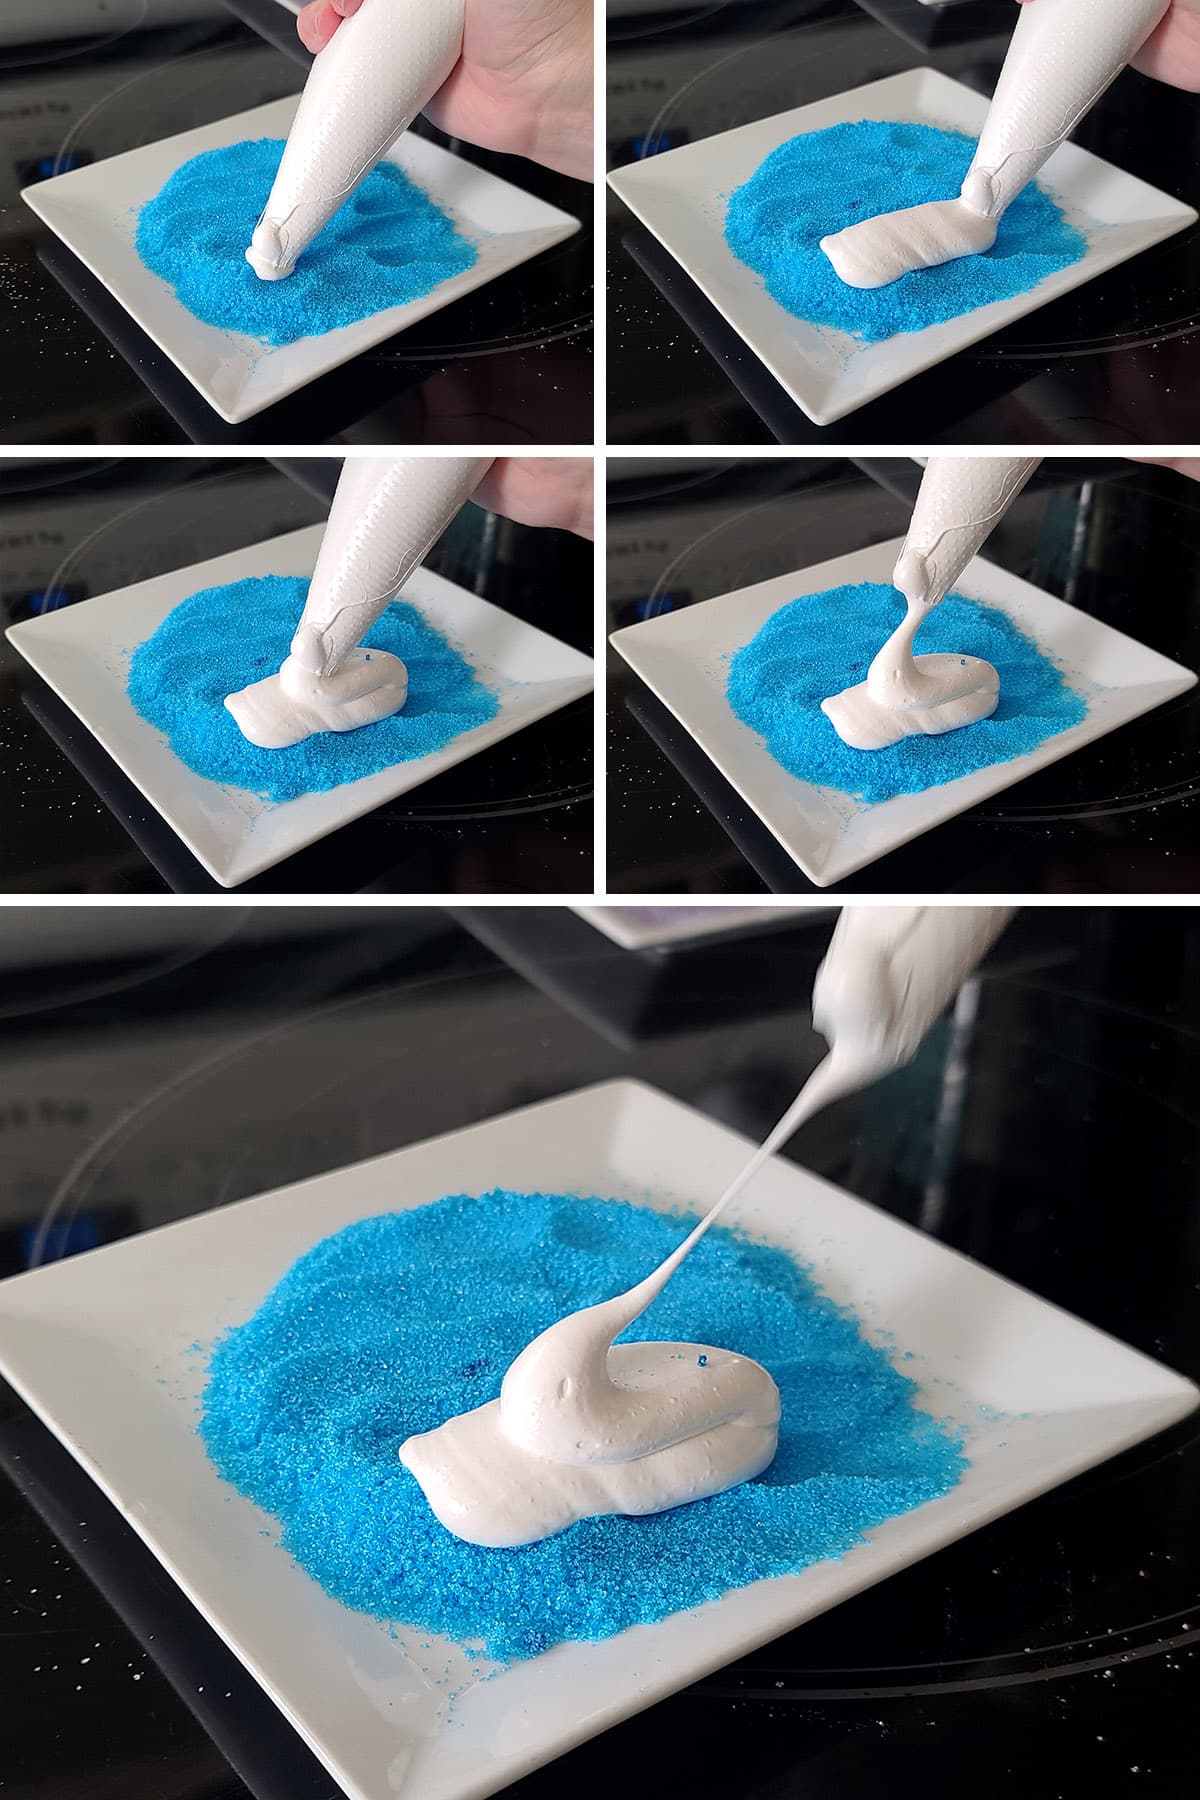
Pipe chick shapes directly onto the sugar plates.
I use pipe a short line downward (the base of the peeps), then ease the pressure a little bit as I swoop back up over the line to create the body of the chick.
Then I ease off the pressure altogether and let the trailing end of marshmallow form the head, as I pull the bag away:
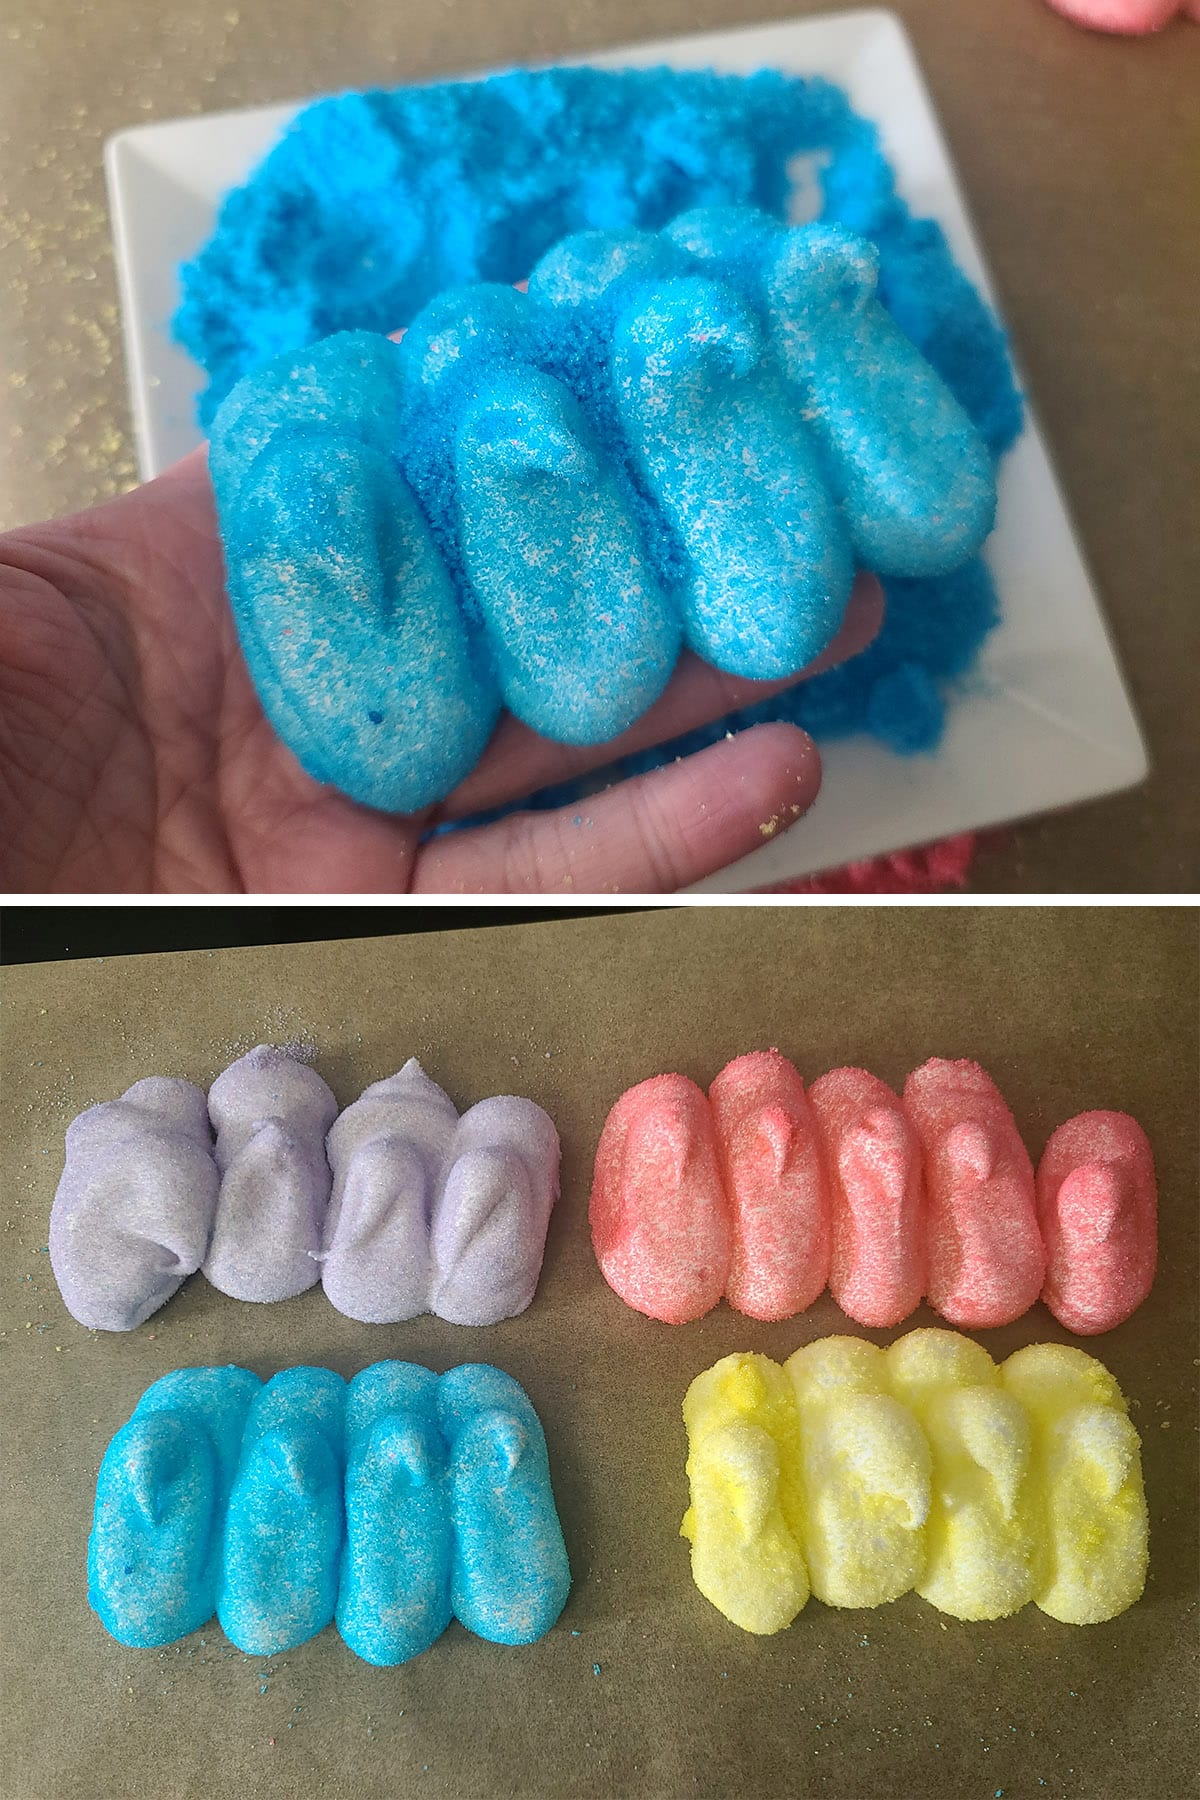
If your marshmallow is oozing rather than holding its shape, let the bag sit (open side facing up!) for 5 minutes or so, to set up a little.

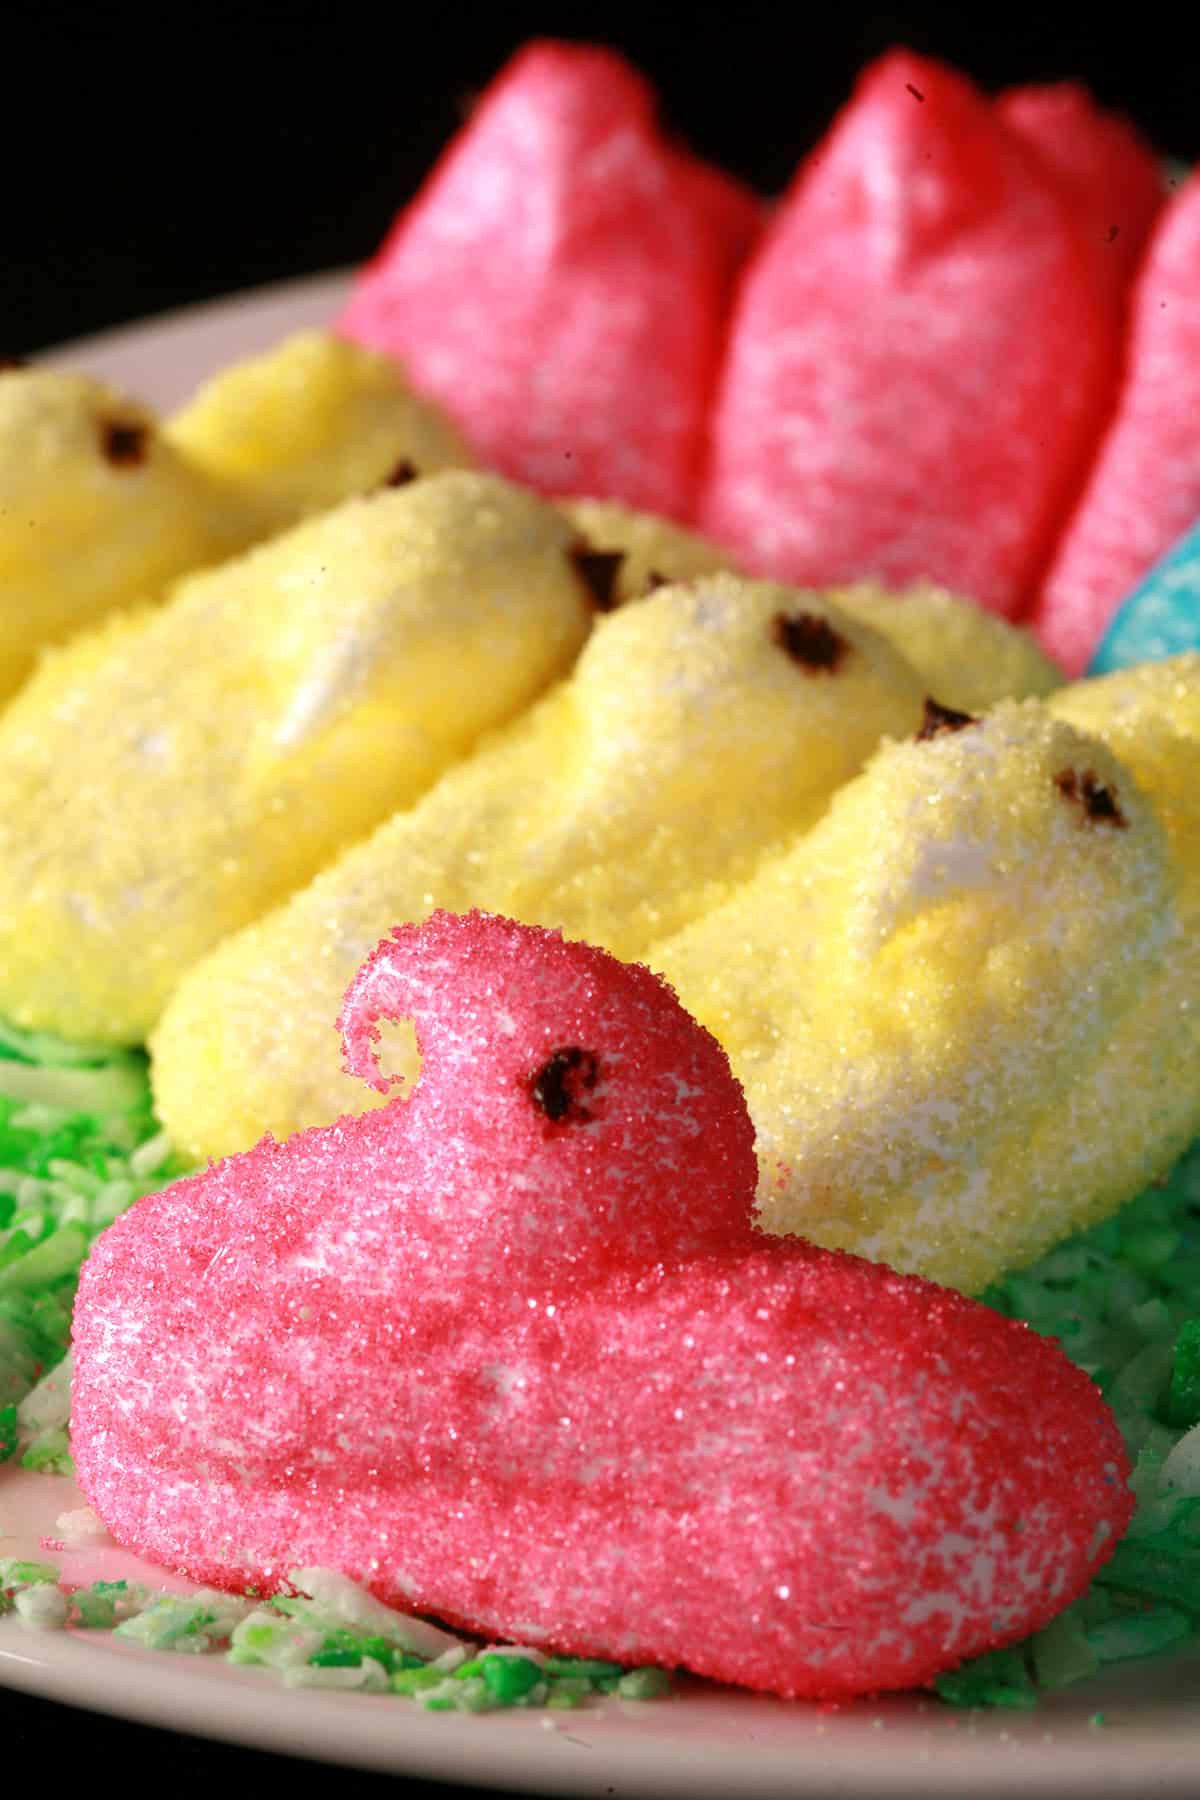
These ones were piped when the marshmallow still needed to set up a little. The messed up ones taste just as good, though!
Allow to set for an hour or so, until firmed up.

Once the marshmallows are set, carefully shake off excess sugar, arrange peeps on a clean work surface.
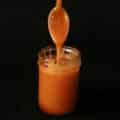
Add just enough water to form a thick “paint”, use a toothpick to apply eyes to each chick.
Transfer peeps to an airtight container - in a single layer - for storage.
More Gluten Free Easter Content!
Looking for more fun / tasty ways to observe Easter? Here are a few of my favourite recipes:
Chocolate Zombie Easter Bunnies
Mini Egg Easter Pavlovas
Easter Pavlova
Easy Pysanky [Epic Easter Eggs]
Gluten-Free Paska [Easter Bread]
Easter Deviled Eggs
Keto Paska
Southern Comfort Glazed Ham

Share the Love!
Before you chow down, be sure to take some pics of your handiwork! If you post it to Bluesky, be sure to tag us - @CelebrationGen. We're also on Pinterest, so you can save all your favourite recipes to a board!
Also, be sure to subscribe to my free email newsletter, so you never miss out on any of my nonsense.
Finally, if you love this recipe, please consider leaving a star rating and a comment, and/or sharing the link on social media!


Homemade Marshmallow Peeps
Equipment
- Stand Mixer Or an electric hand mixer
Ingredients
Coloured Sugar
- ½ cup Granulated Sugar I make this much for each colour, you won’t use all of it.
- Food Colouring Preferably Gel food coloring
Marshmallow Peeps:
- 1 Cup Granulated Sugar
- 1 Packet Unflavoured Gelatin Powder 2 ½ tsp
- ½ Cup Water Divided
- ¼ teaspoon Salt
- 1 teaspoon Vanilla Extract
- Eyes
- 1 teaspoon unsweetened Cocoa Powder
Instructions
Dye the Sugar:
- Place sugar in a plastic baggie - 1 bag, ¾ cup sugar for each colour you plan to use.
- Add a drop or two of food colouring to each bag, press most of the air out of the bag, and seal with the zipper.
- Gently massage the sugar around to distribute the food colouring evenly throughout the sugar, taking care to break down any clumps.
- Once the colour is evenly distributed with no clumping, set bags aside.
Make the Marshmallow:
- In a small, microwave safe bowl, sprinkle the gelatin over ¼ cup of water, set aside.
- In medium saucepan, combine remaining cup of sugar, with remaining ¼ cup of water and salt.
- Cook over medium heat, stirring constantly, until sugar is dissolved. Bring to a boil and continue to cook – without stirring – until mixture reaches 240°F on a candy thermometer.
- Remove from heat and add gelatin mixture, stirring until dissolved and completely combined, with no lumps of gelatin.
- Transfer sugar syrup to the bowl of a stand mixer, allow it to cool for 5 minutes.
- Beat sugar syrup in a standing mixer (or with a hand held electric mixer) on medium speed until it becomes opaque/white.
- Once syrup is no longer clear, add the vanilla and turn the mixer speed up to high.
- Continue whipping the syrup until it is thick, white, glossy, and almost triple the original volume. This may take up to 10 minutes.
Pipe your Peeps:
- Carefully spoon the marshmallow into a large pastry bag. Let it sit for a few minutes while you prepare your sugars:
- Give each bag of coloured sugar a quick shake / massage to break up any clumps of dried sugar. Transfer half of each sugar to individual plates, for piping. Set aside.
- Cut a small amount off the end of the pastry bag, so the opening is maybe ½″ across.
- Pipe your peeps directly onto the sugar plates. I use pipe a short line downward, then a second little swoop up to create the body of the chick - see the post for photos of how to do this.
- If your marshmallow is oozing rather than holding its shape, let the bag sit (open side facing up!) for 5 minutes or so, to set up a little.
- Once your peeps are piped, shake the reserved sugar over each corresponding plate of peeps, completely coating each marshmallow entirely.
- Allow to set for an hour or so, until firmed up.
- Once the marshmallows are set, carefully shake off excess sugar, arrange peeps on a clean work surface.
- Measure the cocoa powder into a small bowl. Add just enough water to form a thick “paint”, use a toothpick to apply eyes to each chick.
- Transfer peeps to an airtight container for storage.
Video
Notes
Nutrition


Thank you for sharing this recipe! We have made it a few times and the only thing we did differently was, to reduce the vanilla extract by 1/2tsp. It was a great bonding experience with my son who now is addicted to homemade marshmallows.