

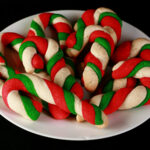
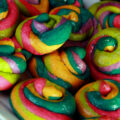
These festive Candy Cane Cookies are fun, tasty, easy to make ... and you'd never know they're GF. They have great flavour and texture!

Note: This recipe was first posted on my original blog, Celebration Generation, on November 10, 2014. It was transferred over to this blog on Feb 25, 2021, and most recently updated on 11/12/2022.
My aunt's Easy Dill Dip, Noelle Cookies, and Sauerkraut Balls (Piroshki)
... Then, there were the Nanaimo Bars and Confetti Squares.
I don't even associate those with any particular person, maybe it was just whoever got around to it? Those bars were pretty ubiquitous around Christmas time, back home in Winnipeg...
Anyway, extended-family contributions aside, there were two sweets I associated with my immediate household’s holiday baking: The weird (but awesome) peppermint patties that my maternal host would make. (I later developed my Peppermint Patties around the idea.)... and candy cane cookies.
It's time to make some gluten-free Christmas cookies!
My Gluten Free Candy Cane Cookies Recipe
Given that I can no longer handle gluten, this version of those candy cane sugar cookies is gluten-free... but you'd never know it.
As with all of my other Gluten-free Recipes, this candy cane cookie recipe was developed from the ground up, rather than being an adapted normal gluten recipe.
I chose the flours, other ingredients, and techniques to work together to produce a cookie that not only tastes great, but also has a great texture.
There's none of the chalkiness or weird aftertastes generally associated with gluten-free baking. They just taste like Christmas, and are totally suitable for a mixed crowd, as far as gluten allergies go.
SO, they’re perfect for making any holiday cookie box, cookie exchange, or Christmas cookie trays a little more inclusive!
Merry Christmas!

Ingredients
This recipe uses fairly simple ingredients, and should be relatively easy to find them in most larger grocery stores.
A few notes for you:
The Gluten Free Flour Mix
As with all of my gluten free baking, I use individual flours, rather than an all purpose flour mixture.
This gives me a lot of control over the flavor and behaviour of the dough, and really gives the best results.
All gluten free flours have different flavours and properties, and the premade mixes have different ingredients and ratios.
By measuring them separately, you don’t have to worry about which brand you’re using!
For these cookies, the blend of flours I use involves:
Coconut Flour
Sorghum Flour
Tapioca Starch / Tapioca Flour
White Rice Flour
Xanthan Gum
Peppermint Extract
Be sure to use actual Peppermint Extract, not essential oil.
If you’d like your cookies to have just a hint of peppermint flavor, use a bit less flavouring, or go half and half with vanilla extract.
Not into peppermint, but like the aesthetic of candy cane sugar cookies?
Feel free to use Pure Vanilla Extract or Almond Extract instead.
Gel Food Coloring
When it comes to painting with food colouring, I prefer to use a nice quality gel based colour, such as Americolor (what I used when I was in the USA), or ChefMaster (Which is the option more readily available here!).
If I have some on hand, I’ll add some Americolor White Gel Paste to colour the white pieces, but it’s not necessary.
Without white colouring, the white dough will actually be a brownish ivory colour - still totally identifiable as a candy cane, without colouring it white!
Everything Else
Rounding out this recipe, you will need:
Granulated sugar
Unsalted butter
Large eggs
Baking powder
Salt
.... I just don’t have anything to add, as far as these ingredients go!

How to Make Gluten-Free Candy Cane Cookies
I’ve been told that people don’t like photos in the recipe card itself, so let me go over the technique here, in the post!
Once you’ve made the dough...
Divide and Tint Your Dough
Divide dough into 3 pieces: 2 larger balls of about the same size, and one smaller ball (about half the size of the other two).
Note: I find that if I don’t do the green ball much smaller than the other two, the amount of green on the final cookie is overwhelming.
At half the amount, it ends up seeming to be an equal amount to the other two, in the end!
Knead in until coloring is evenly incorporated in each dough ball.
Note: I like to wear nitrile gloves for this step, because gel food colouring is no joke! I start with the white piece of dough, to avoid accidentally transferring other colors to it. Then red, then green.
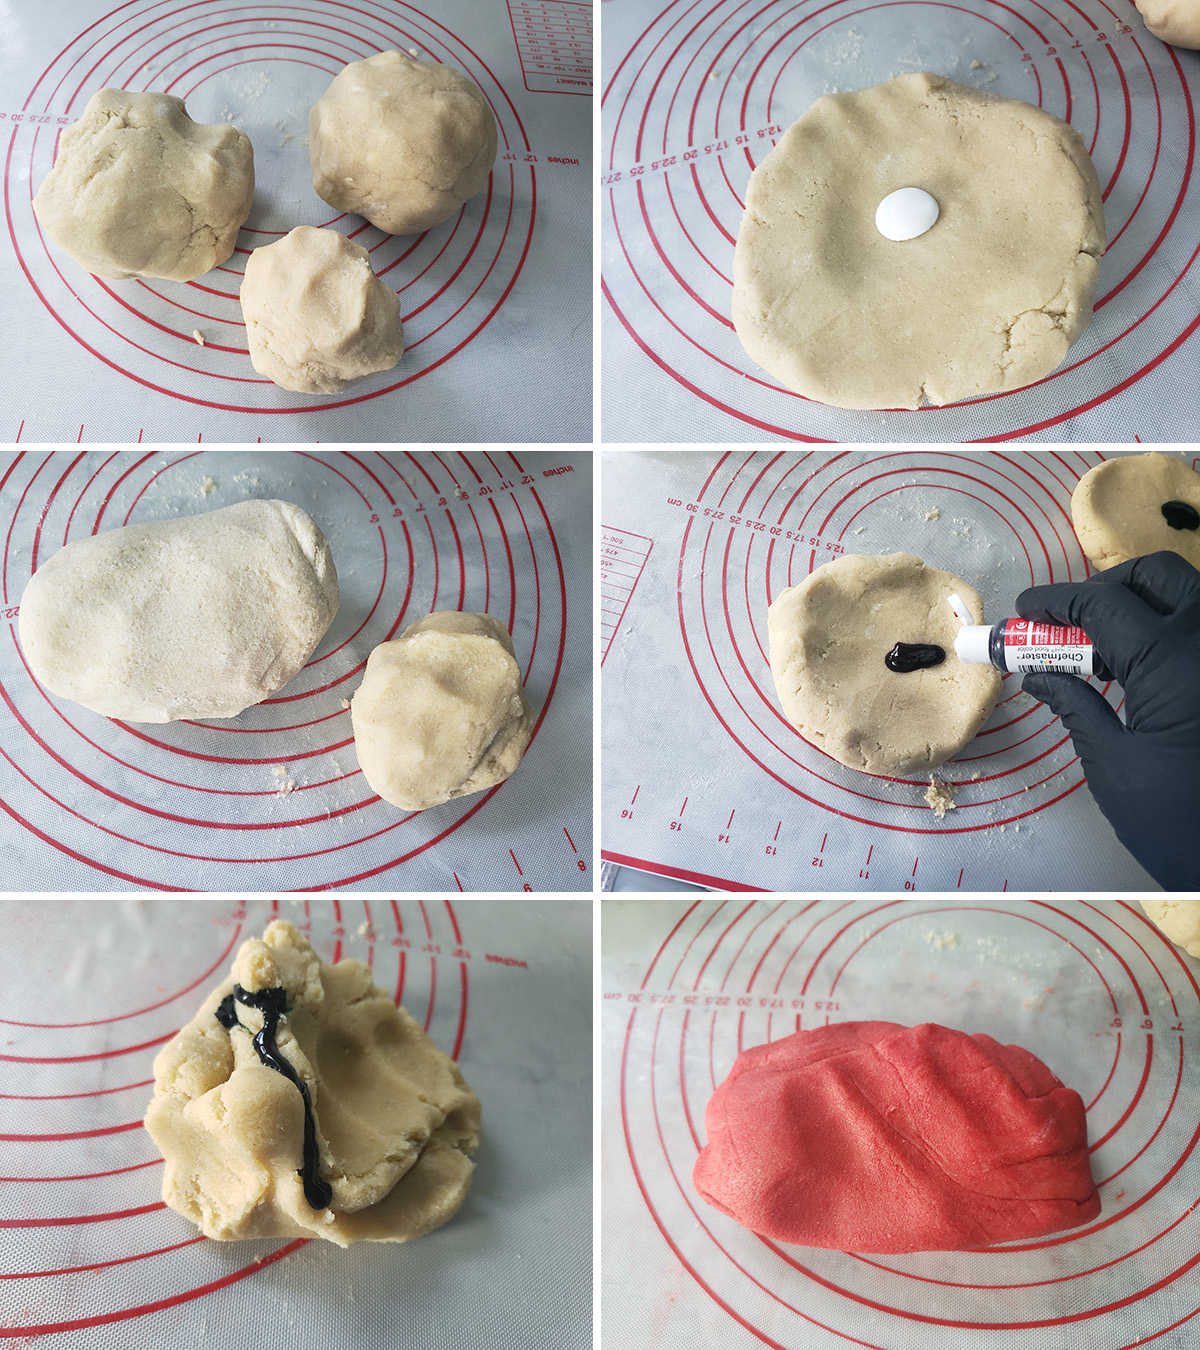
Once the doughs are all tinted as you want them, wrap each of the pieces of dough - separately - in plastic wrap, chill for 1 hour.

Divide and Conquer!
Preheat oven to 375F, line cookie sheets with parchment paper, and wash your hands!
Divide each dough ball into 4 equal pieces, and each of those 4 pieces into 4 pieces. You should have 16 pieces of each color.
You can divide the first 4 pieces each into the next 4 pieces right from the cut state, or you can roll each of the original 4 into a long rope, and divide it from there.

So, I divided the original 4 into the 16 by rolling, as I thought that was *it* for the dividing. ANYWAY.
Roll Your Candy Cane Cookies!
There are two different techniques you can use here. One will produce a smooth Candy Cane Cookie, and the other will produce a cookie with a fun, rope type texture. (I've got video demonstrating both techniques a bit further down, also!)
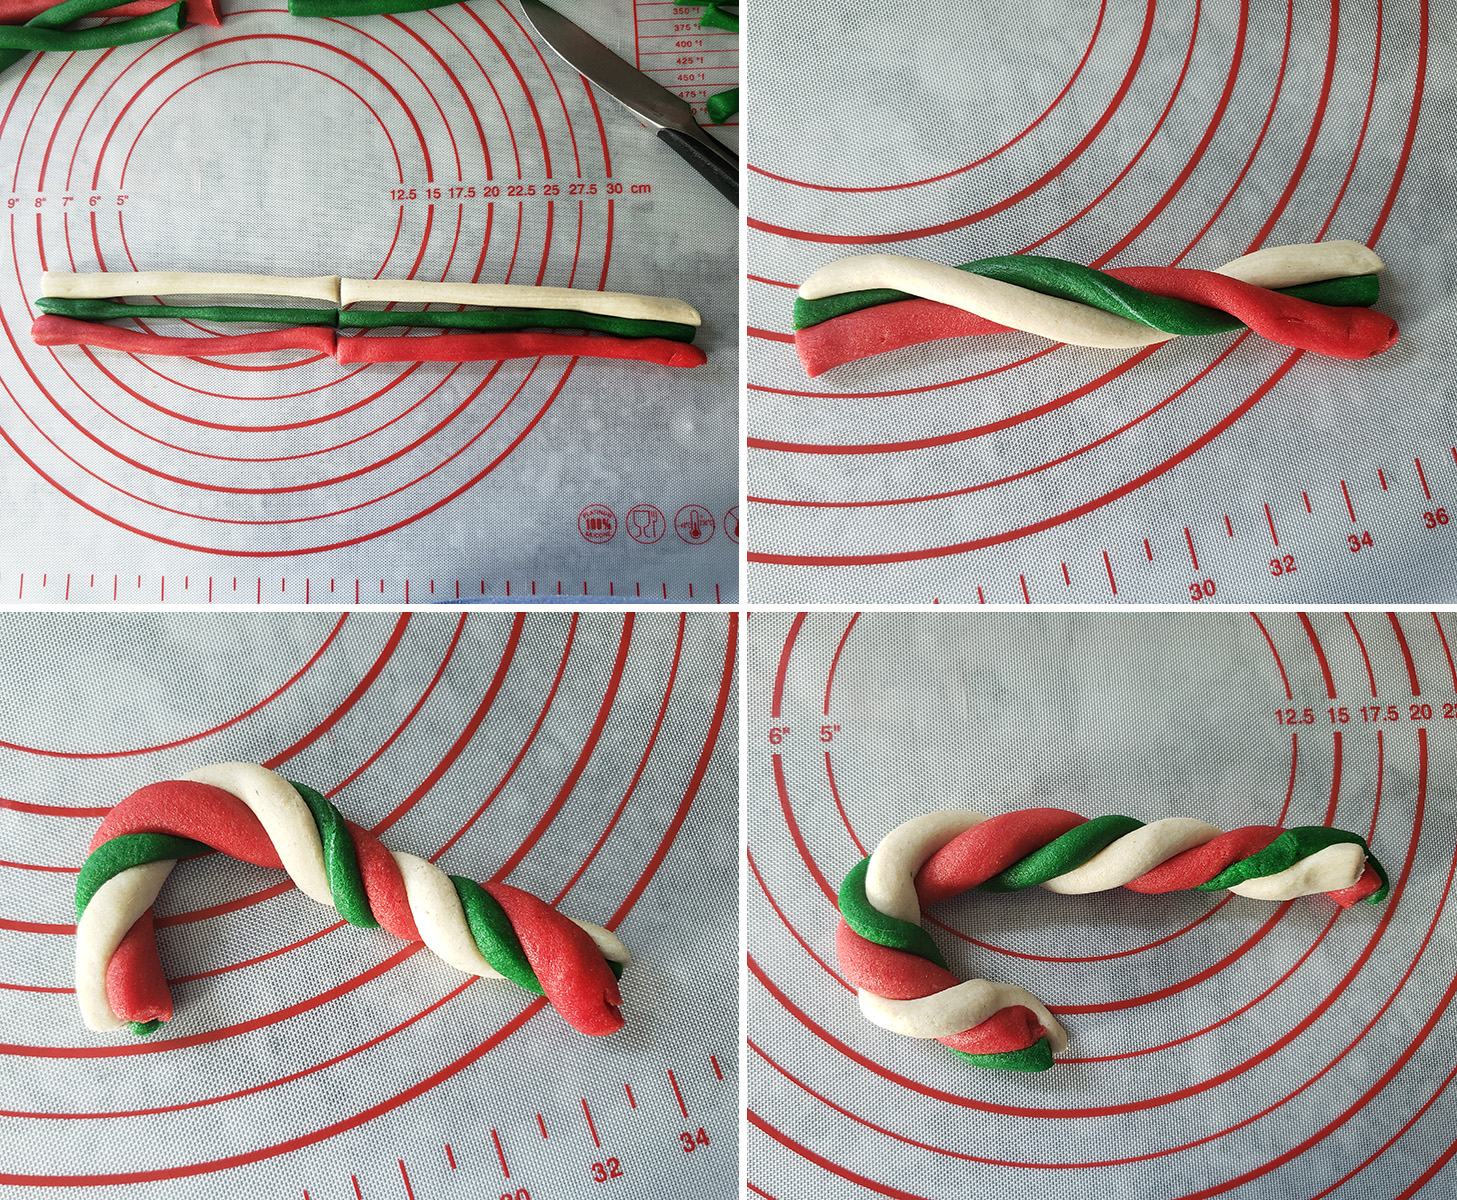
Smooth Candy Canes
Take 1 each of the 3 colours, and roll them out to long snakes of dough, about 10" in length. Aim to get them relatively even in thickness throughout the length of each rope.
Line the dough up as shown, gently squish together to adhere.
Roll the joined dough pieces together gently, just to secure and form a single, rounded rope about 11-12" in length.
Cut your rope into 2 equal lengths of about 6" each.
Gently twist each length to form the spiral design, then shape the twisted ropes into a candy cane shape.

Place each on a prepared baking sheet as you finish them.

Rope Candy Canes
Take 1 each of the 3 colours, and roll them out to long snakes of dough, about 12" in length. Aim to get them relatively even in thickness throughout the length of each rope.
Cut each rope into 2 equal lengths of about 6" each.
Take one each of the 3 colours of 6" dough rope, stack and gently twist to form the spiral design.
Shape into a candy cane shape.
Bake Your Christmas Cookies!
Bake cookies for 10-12 minutes, or until golden brown on the bottom.
Cool for 5 minutes or so before transferring them off the pan, allow to cool to room temperature.
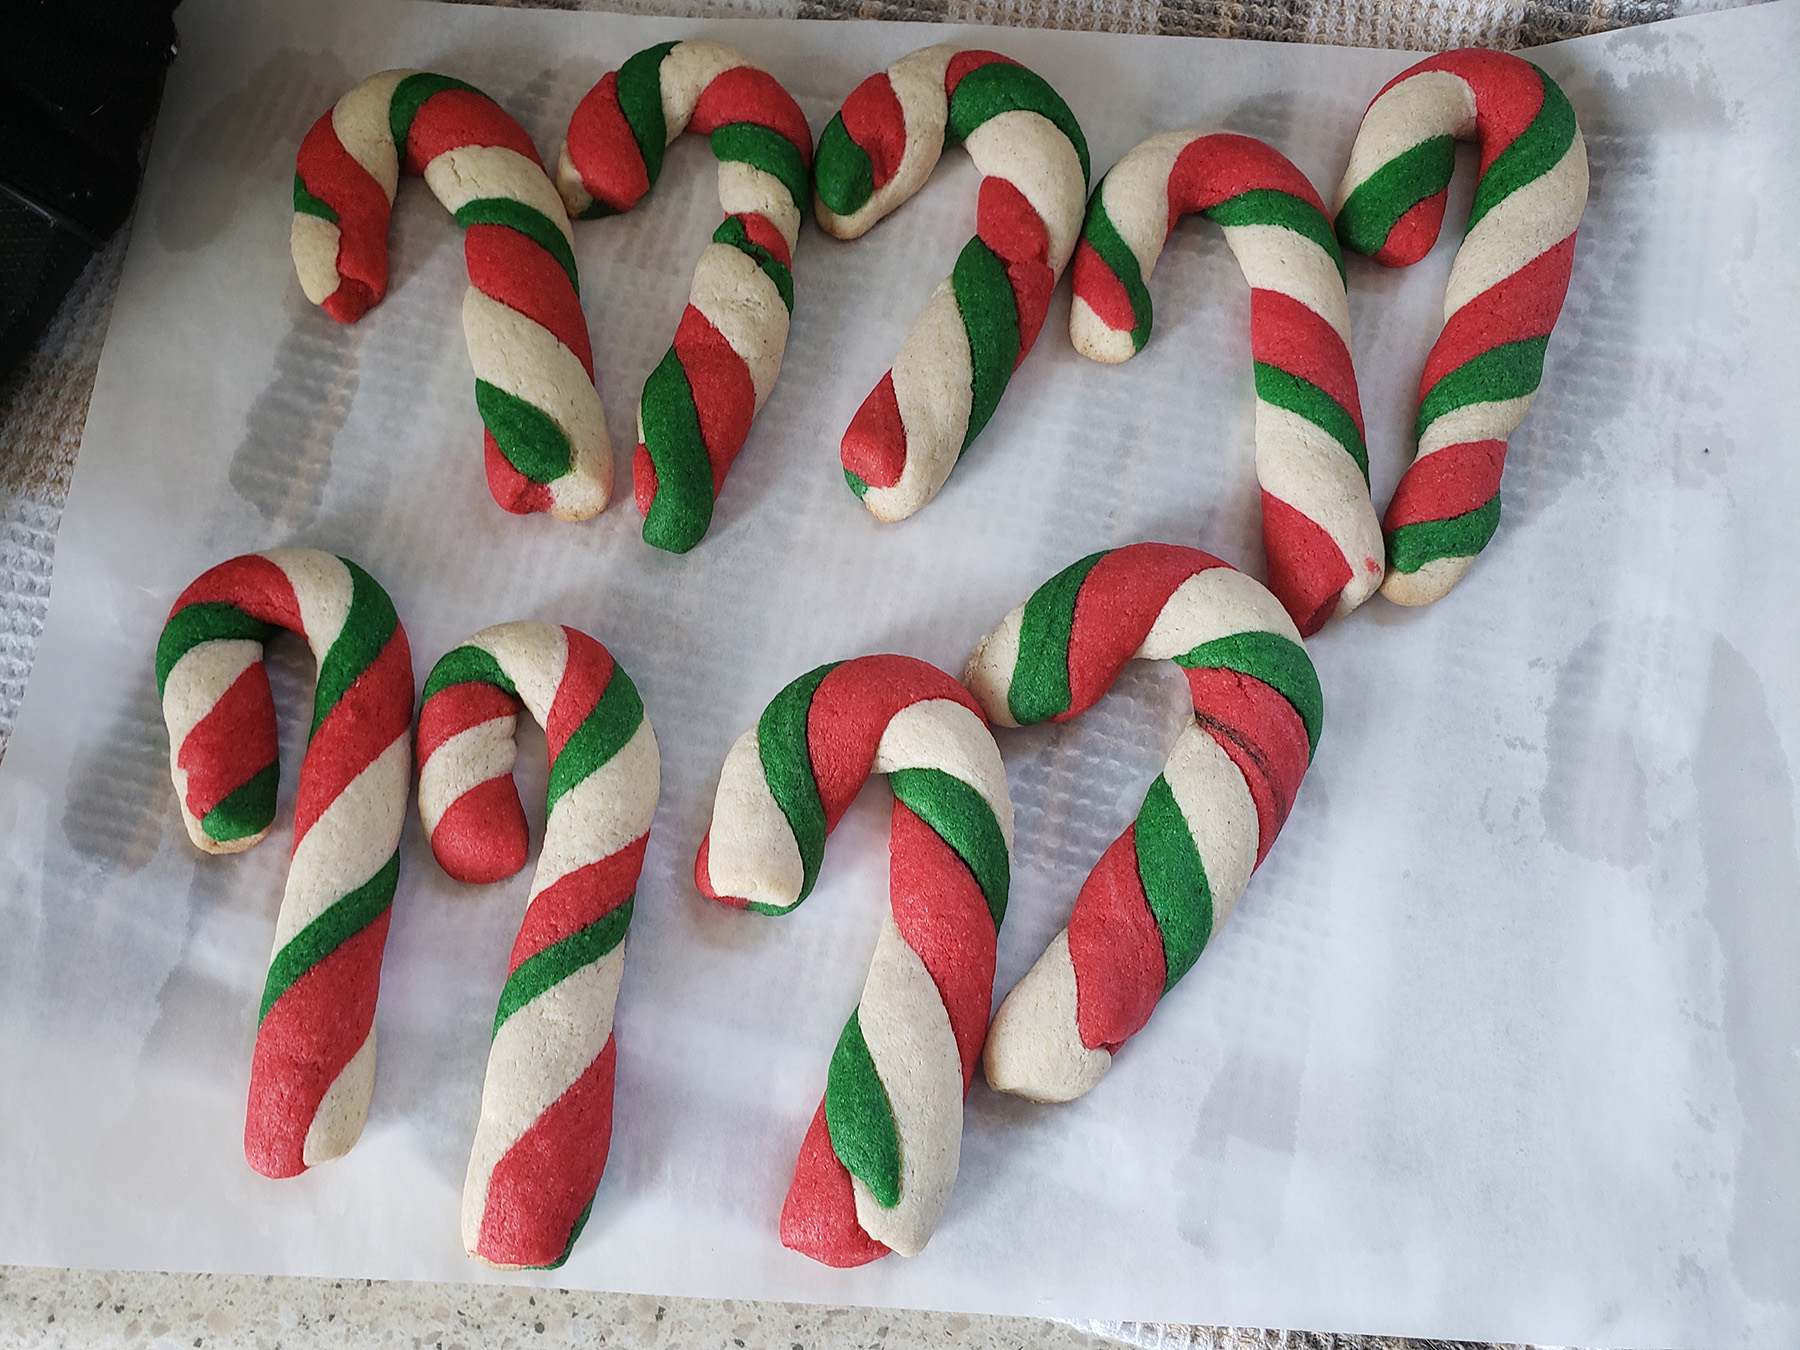
Enjoy!

More Gluten-Free Holiday Recipes!
Looking for something festive - for the whole family? Here are some great options!
Cranberry Chicken
Cranberry Jello Salad
Gluten-Free Fruitcake
Gluten Free Fruitcake Cookies
Gluten-Free Gingerbread Cookies
Gluten Free Gingerbread Scones
Gluten Free Maple Pumpkin Pie
Gluten-Free Pumpkin Spice Mini Doughnuts
Gluten Free Paska [Easter Bread]
Gluten-Free Sauerkraut Buns [Pyrizhky]
Gluten Free Stuffing Recipe
Pumpkin Cheese Ball - Classier Version
Pumpkin Cheese Ball - Trashier Version
Roasted Carrots & Parsnips
Slow Cooker Pork Tenderloin with Fruit Sauce
Sweet Potato Souffle
Turkey Meatballs with Cranberry Glaze

Share the Love!
Before you chow down, be sure to take some pics of your handiwork! If you post it to Bluesky, be sure to tag us - @CelebrationGen. We're also on Pinterest, so you can save all your favourite recipes to a board!
Also, be sure to subscribe to my free email newsletter, so you never miss out on any of my nonsense.
Finally, if you love this recipe, please consider leaving a star rating and a comment!

Gluten-Free Candy Cane Cookies
Equipment
- Parchment Paper
Ingredients
- 1 cup White rice flour
- 1 cup Sorghum flour
- ¼ cup Coconut flour
- 2 tablespoon Tapioca Starch/Flour
- 2 teaspoon Xanthan gum
- 1 teaspoon Baking powder
- ½ teaspoon Salt
- ¾ cup Butter softened
- 1 ¼ cup Granulated sugar
- 2 Large eggs
- 2-3 teaspoon Peppermint extract
- Gel food colouring
Instructions
- In a medium bowl, whisk together all dry ingredients (except sugar) until well combined, set aside.
- In a separate bowl - the bowl of a stand mixer fixed with a paddle attachment, or a large bowl, if using a hand mixer - cream butter and sugar until smooth and fluffy.
- Be sure to scrape down the sides of the bowl a few times, to make sure everything is incorporated into the mix.
- Add the eggs to the mix, one at a time, beating well between each addition. Add peppermint extract, and mix until well incorporated and smooth.
- With mixer turned down to low speed, slowly add dry ingredients mix to the mixing bowl of wet ingredients, and carefully mix until well incorporated and smooth.
- On a clean work surface, divide dough into 3 balls - 2 larger balls of about the same size, and one smaller ball (about half the size of the other two)
- Add food colouring to the balls - red to one of the larger ones, white to the other (optional), and green to the smallest. Knead in until colouring is evenly incorporated in each dough ball.
- Wrap dough balls - separately - in plastic film, chill for 1 hour. This is an important step for gluten free cookie dough, don’t skip it!
- Preheat oven to 375F, line cookie sheets with parchment paper.
- Divide each dough ball into 4 equal pieces, and each of those 4 pieces into 4 pieces. You should have 16 pieces of each colour.
- Following your choice of directions in the post, roll the dough balls out into thin logs, cut in half, and roll into candy cane cookies.
- Place on prepared baking sheets as you finish them.
- Bake cookies for 10-12 minutes, or until golden brown on the bottom.
- Once completely cool store in an airtight container until serving.
Video
Nutrition

These Gluten-Free Candy Cane Cookies are fun, easy to make, festive... and you'd never know they're GF. They have great flavour and texture!


Do you have the flour measurements by weight? Thanks!
I don't - I measure everything.
Would you recommend shortening or a vegan butter substitute?
I've never tried it with vegan butter substitutes.